


by Kelly Lanza

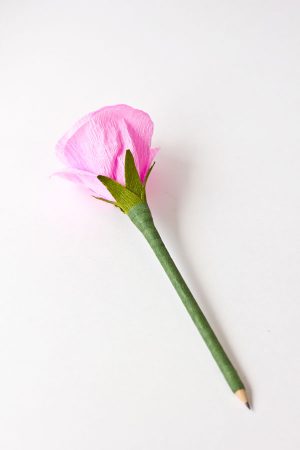
Every spring I obsess of paper flowers. I obsess over real flowers too, but the paper variety tug strongly at my heart because I can actually keep those ones alive! Hooray! I’m always trying to think of fun ways to use them other than just popping them in a vase, and here’s one of them… paper flower pencils! (And pens, too.) These flower-topped pencils would be so fun for signing a party guest book, giving out as favors or just for writing your thank you notes. Grab some crepe paper and let’s get started!


- Crepe paper (in three colors for the center, petals and greenery)
- Pencils or pens
- Floral tape
- Craft glue
- Scissors
- Lollipop stick or skewer (for curling petals)


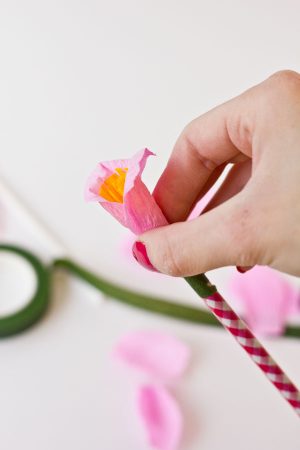
First cut a 2″ x 1″ strip and a small square of crepe paper for the flower’s center. Cover the pencil’s eraser (or top of the the pen) with the square and secure with floral tape. Fringe one side of your crepe strip and wrap it around the top of the pencil. Secure again with floral tape.


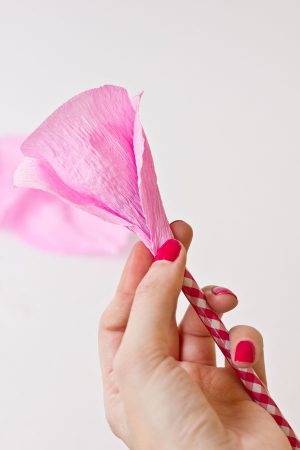
Cut out five smaller petal shapes (about 1.5″ tall) and six larger petal shapes (about 2.5″ tall). For each petal, large and small, stretch the center of the petal to form a “cupping” shape. Then curl the top of the petal under using your lollipop stick or skewer.
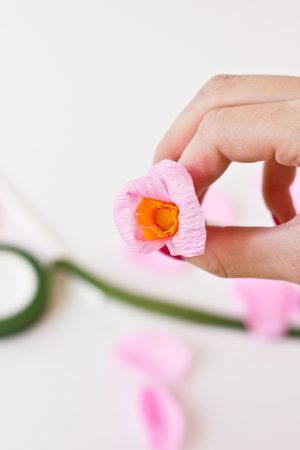
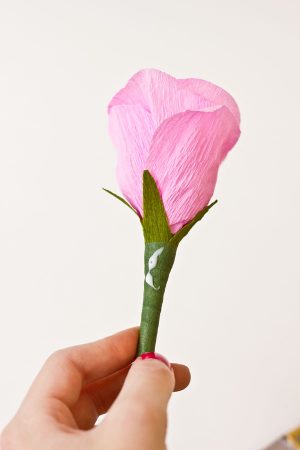
Starting with the smaller petals, wrap each around the pencil, rotating the pencil each time so they petals are spread out, and secure all five with floral tape.

Then add your larger petals using the same method. I recommend taping between every one-two petals and looking at your flower to see where you want to place the next petal(s).
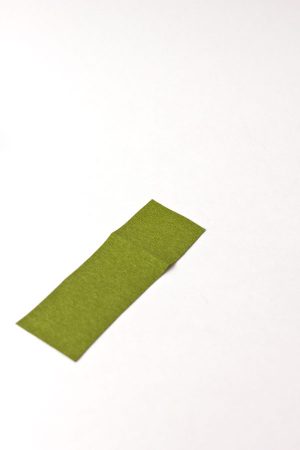
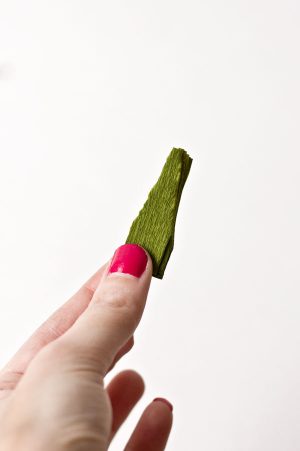
Cut a 1″ x 3″ strip of green crepe paper and fold in half and in half until you have a half-inch wide section. Cut one end into a point, forming the flower’s calyx.
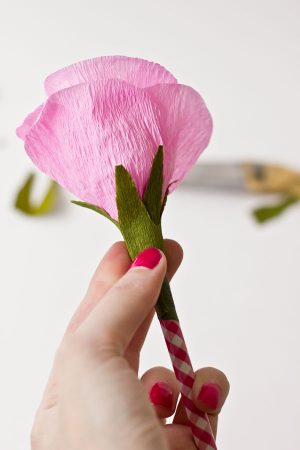
Wrap this around the base of your flower and secure with floral tape, this time wrapping all the way down the pencil.
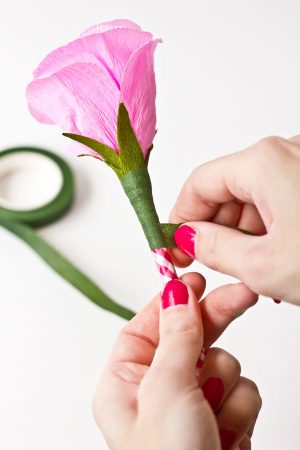
Now we need to cover the tape with crepe paper to finish it up! Cut a long 1″ wide strip of crepe and place a dot of glue just under the calyx.
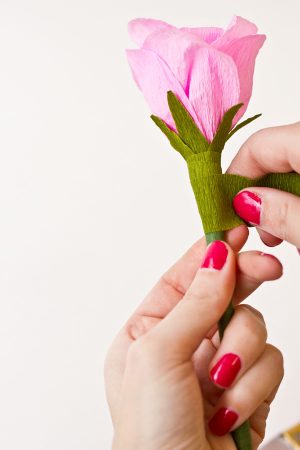
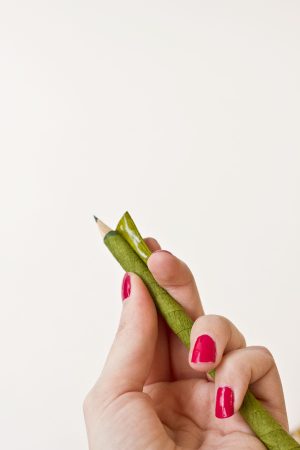
Attach your crepe paper and wrap around and around until you reach the bottom. Secure with another dot of glue.

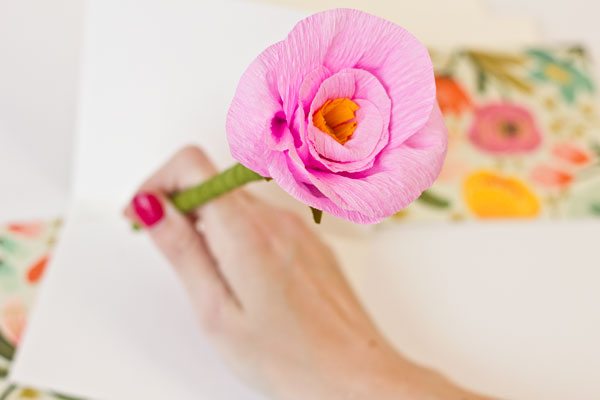
Wouldn’t these be great for a bridal shower or a little lady’s tea party!? I want to make dozens in all different colors. Hope you do too!
![]()
[Photos by Studio DIY for The Sweetest Occasion.]
The fine print: Please link with love! As with all of our posts, DIY projects featured on The Sweetest Occasion may not be copied, distributed or reproduced without express written permission. Love and links are always appreciated! If you’d like to share this post, please link to this post directly for the DIY tutorial and do not include the instructions in your own post. Thanks so much! xoxo


 Back to Top
Such a cute ideea!! I was just wondering..can you sharpen these pencils?
Love that idea, Icing Designs! These would make such fun teacher gifts!!
I love this project Kelly. Perfect for back to school too.
Such a great idea, with the end of the school year comiing these would be so cute to give your kiddos teacher too!
I used to make these flowers when I was a kid. Such a lovely idea to put them on pencils! Would make a lovely party favour! Thanks for the inspiration :)