


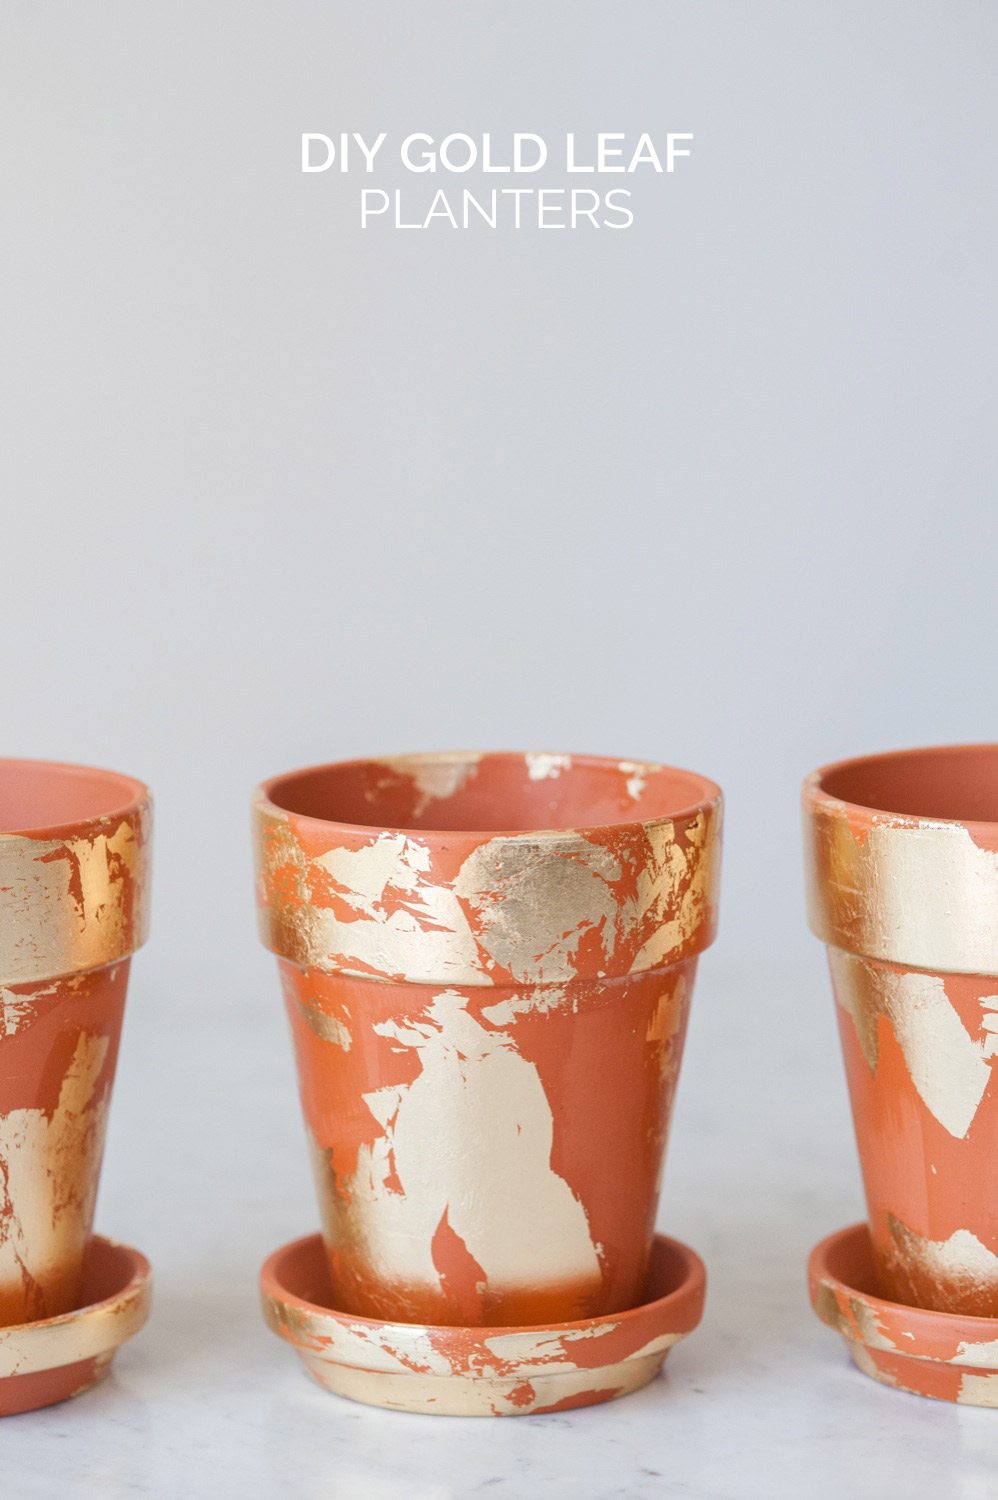
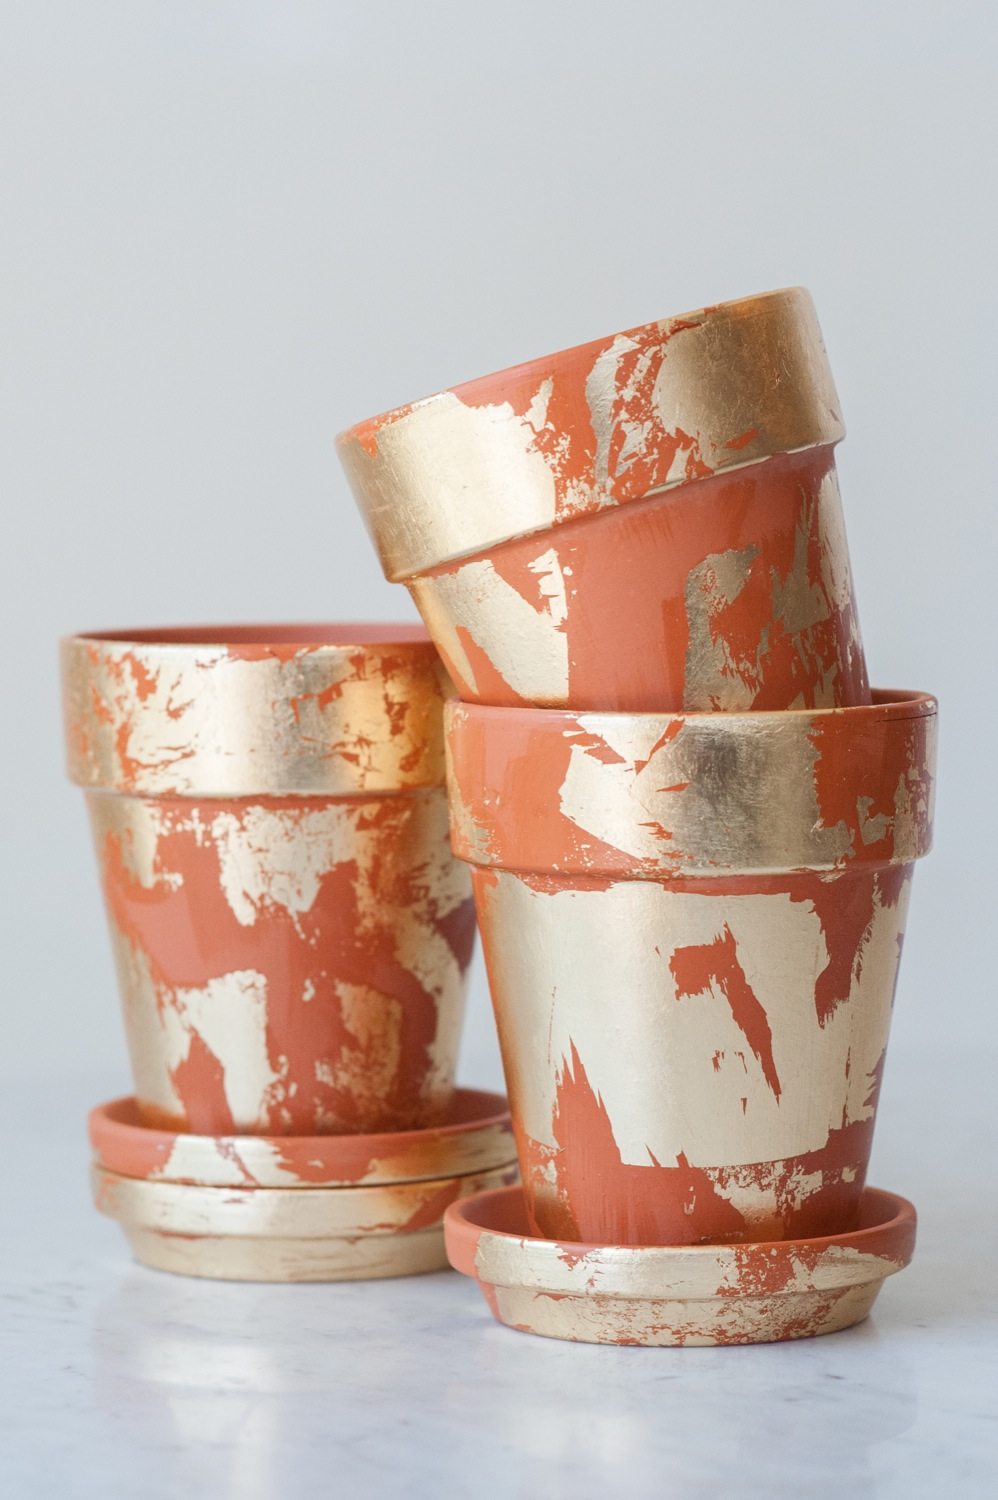
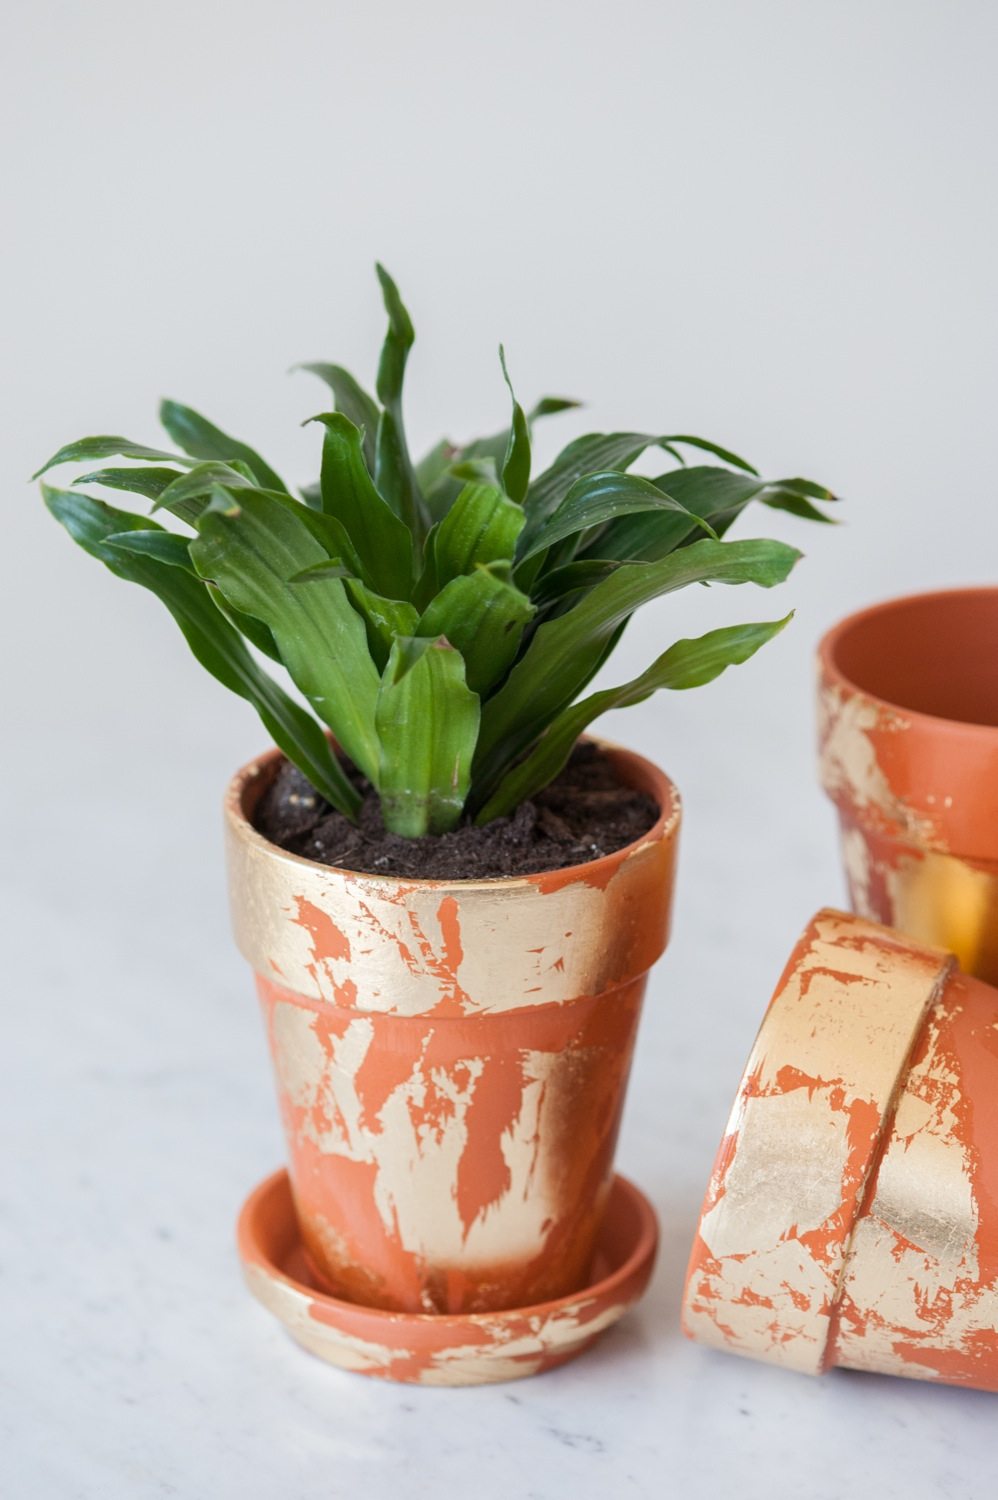
Friends, I am so excited to share this pretty little gem of a DIY tutorial with you today! This is one of my favorites, basically of all time, and I’ve been sitting on it for a few weeks now just itching to show it off. It’s not even a little bit of a secret that I really really love gold leaf. The only thing I can’t figure out is why I don’t use it more often! So as we were headed into spring, I had this idea to get some gold leaf all up on some planters and thus these gold leaf terra cotta pots were born! I present you, the loveliest DIY gold leaf planters you ever did see. Promise you won’t be intimidated by the gold leaf? I promise, even you self-proclaimed uncrafty types can rock this!
![]()
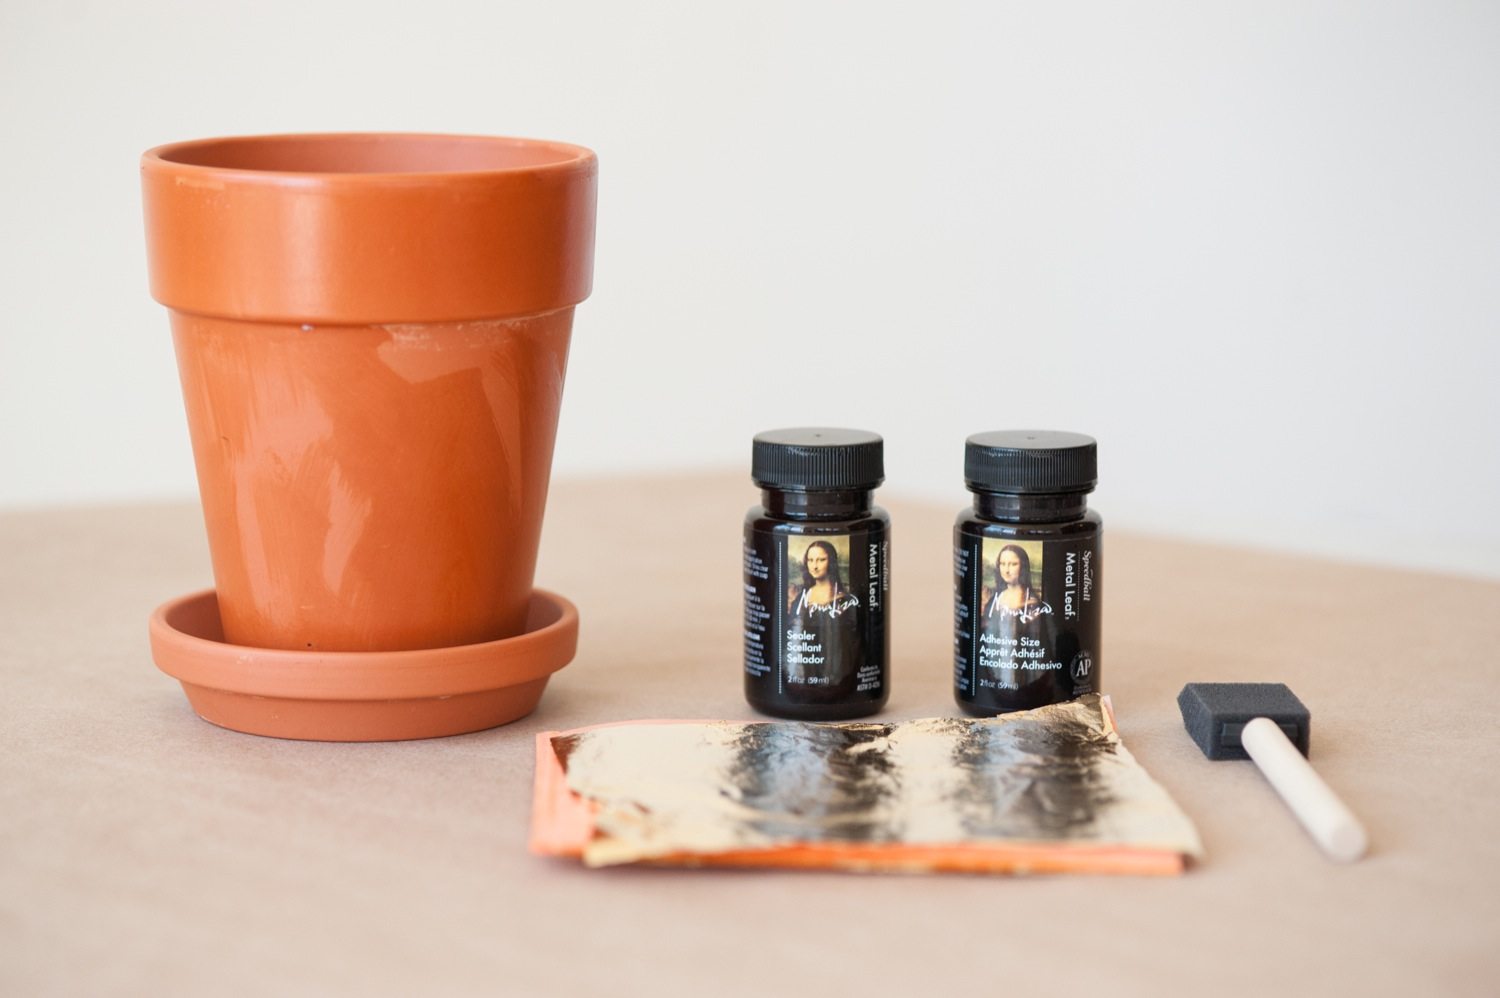
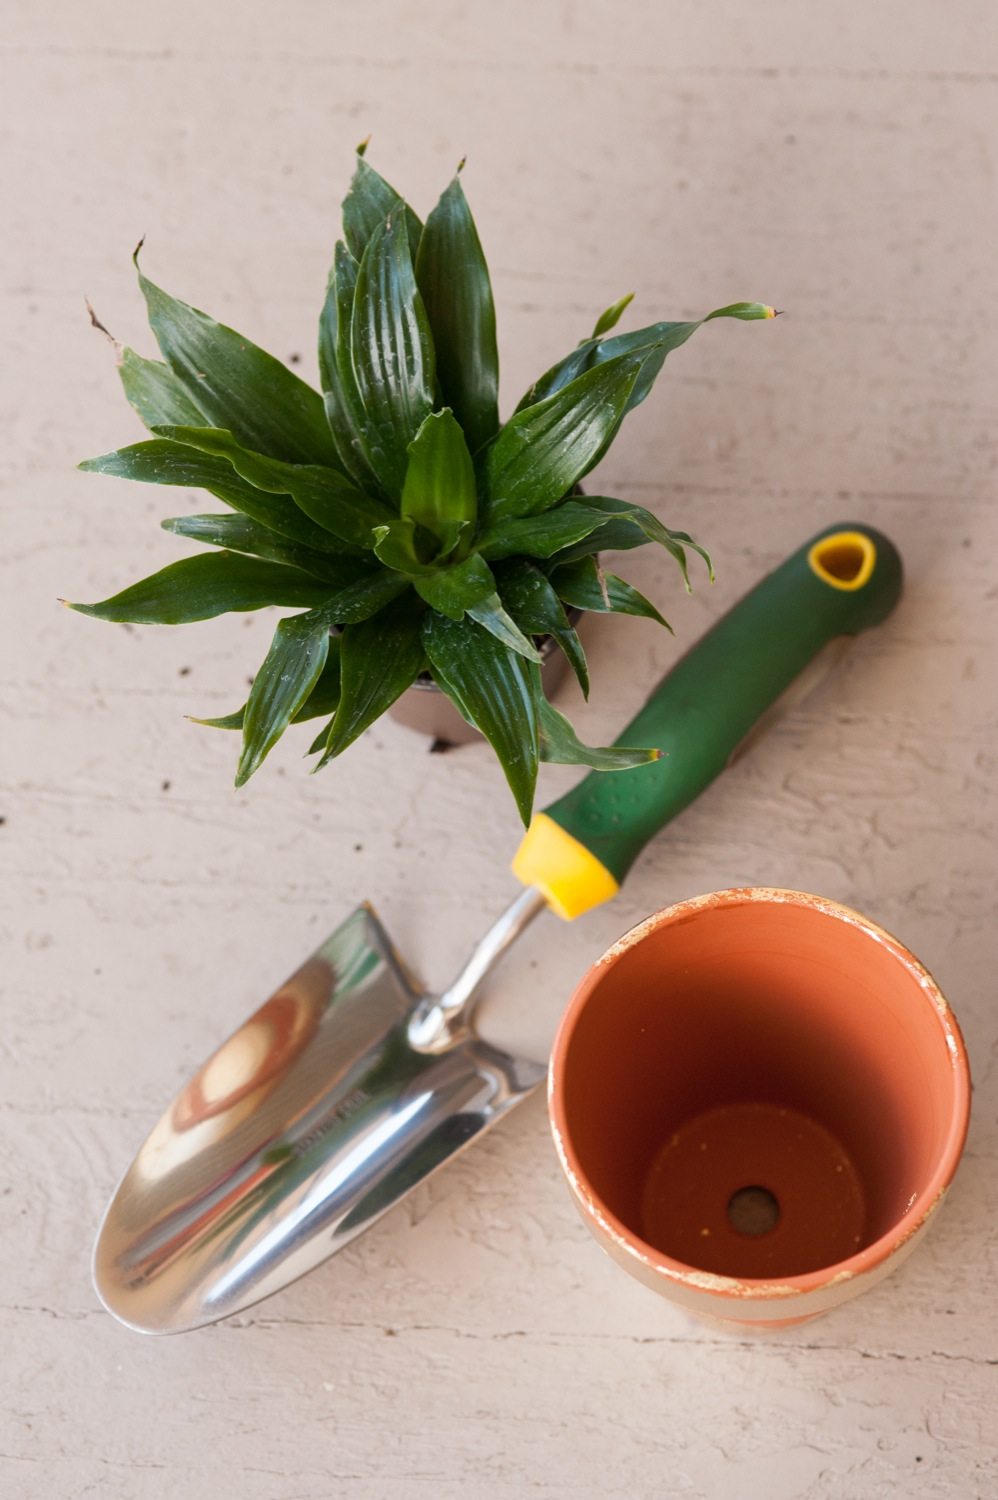
- Terra cotta pots
- (2) clean craft brushes (I prefer foam)
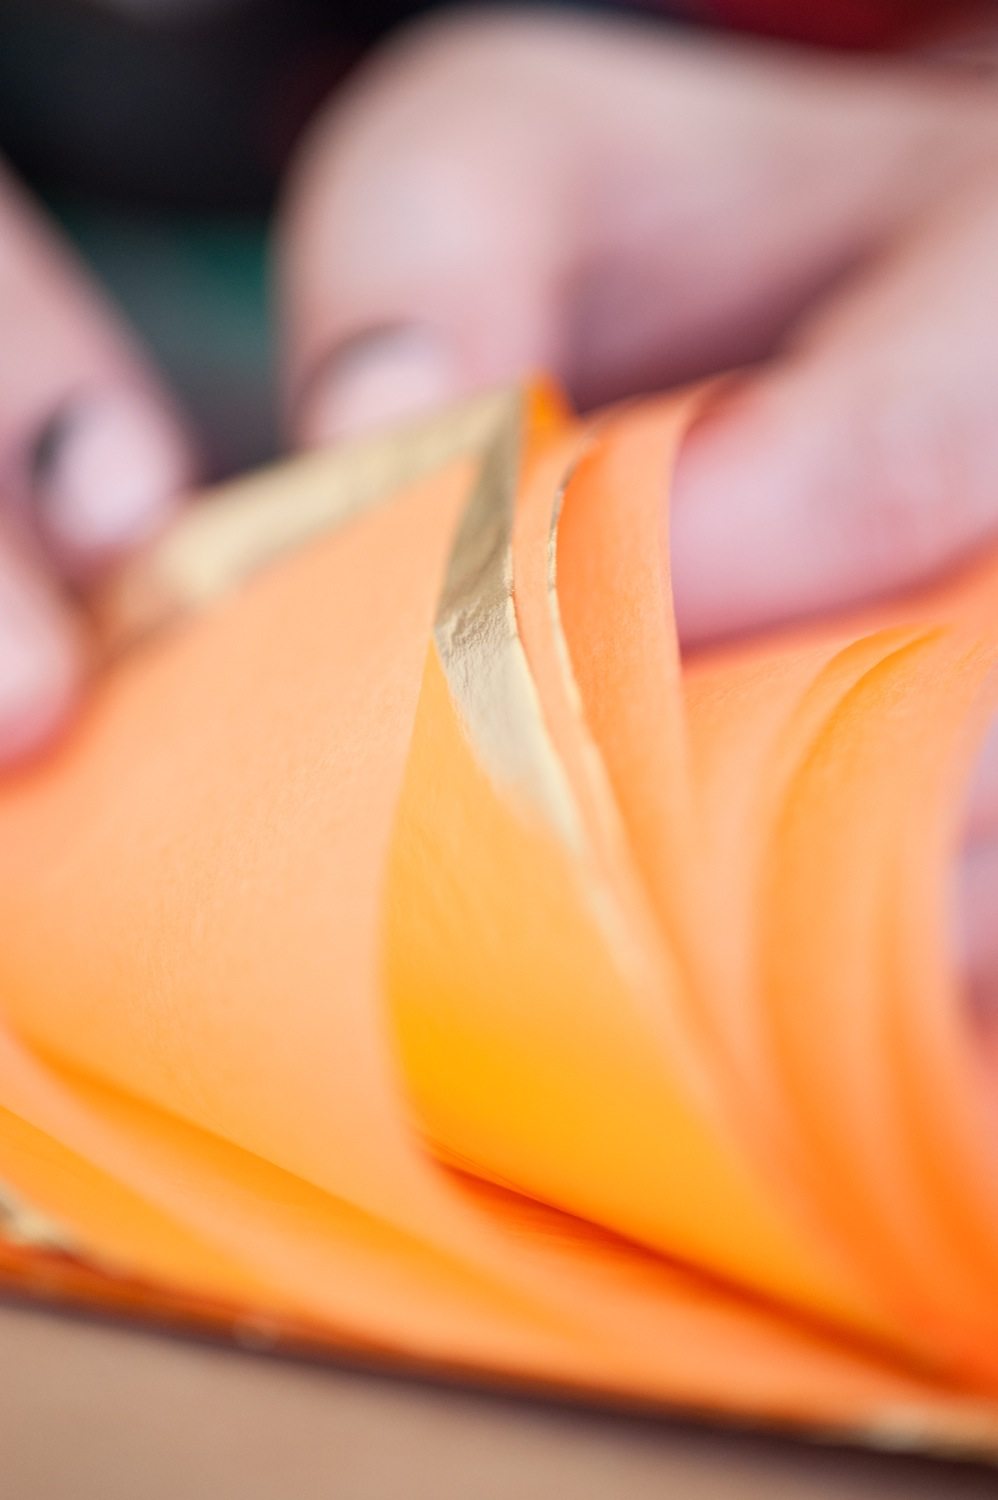
- Gold leaf sheets
- Gold leaf sizing
- Gold leaf sealer
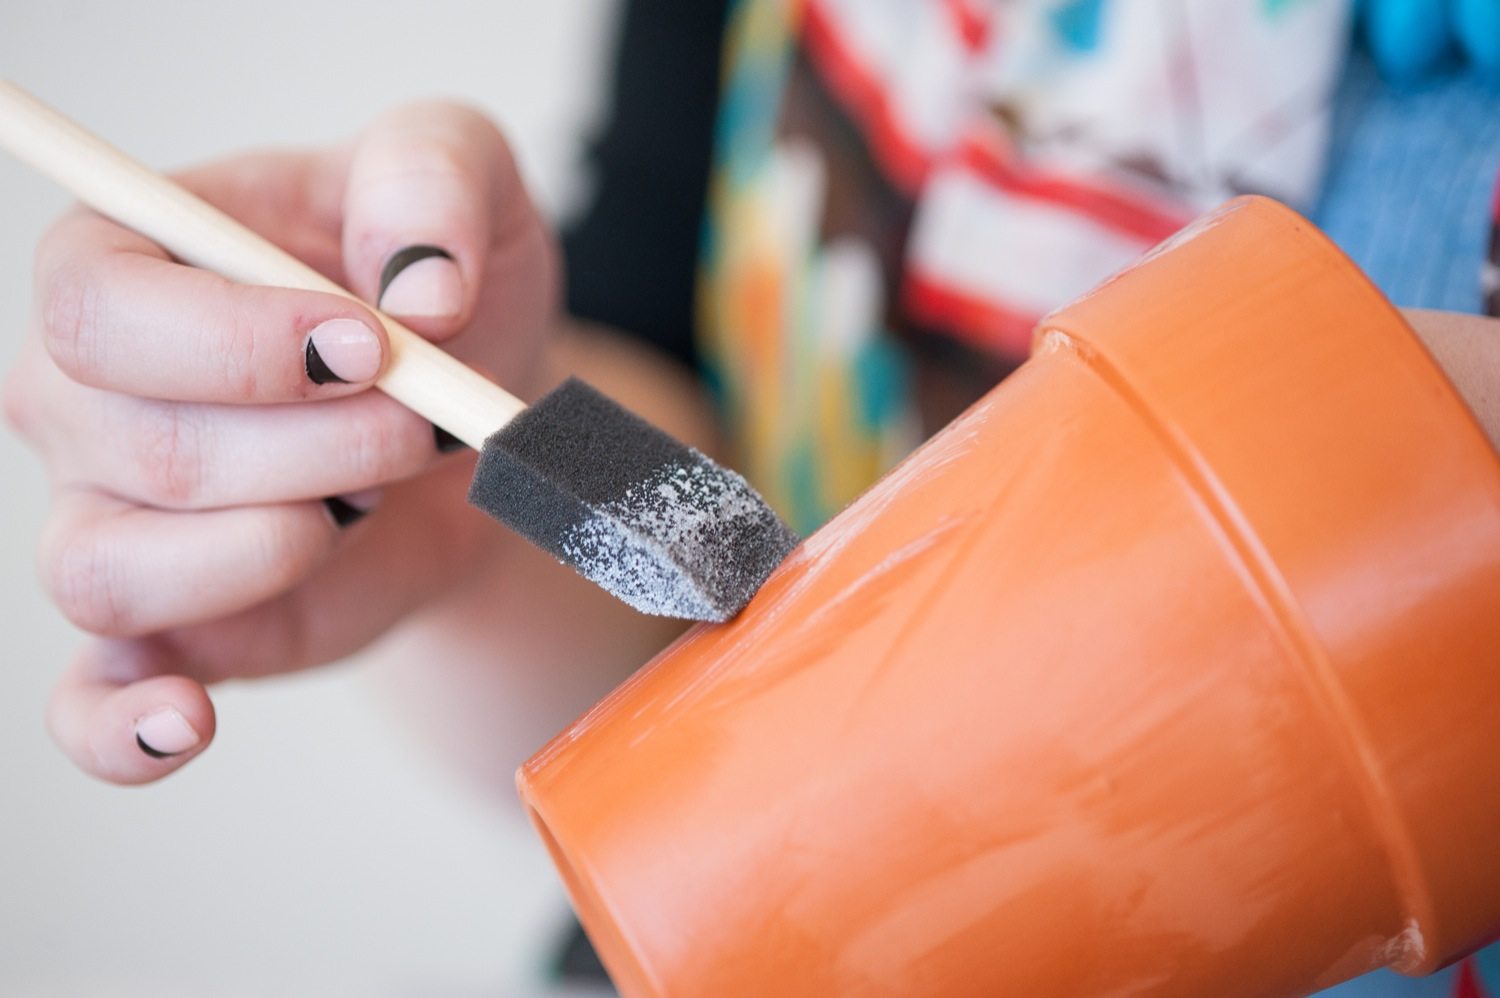
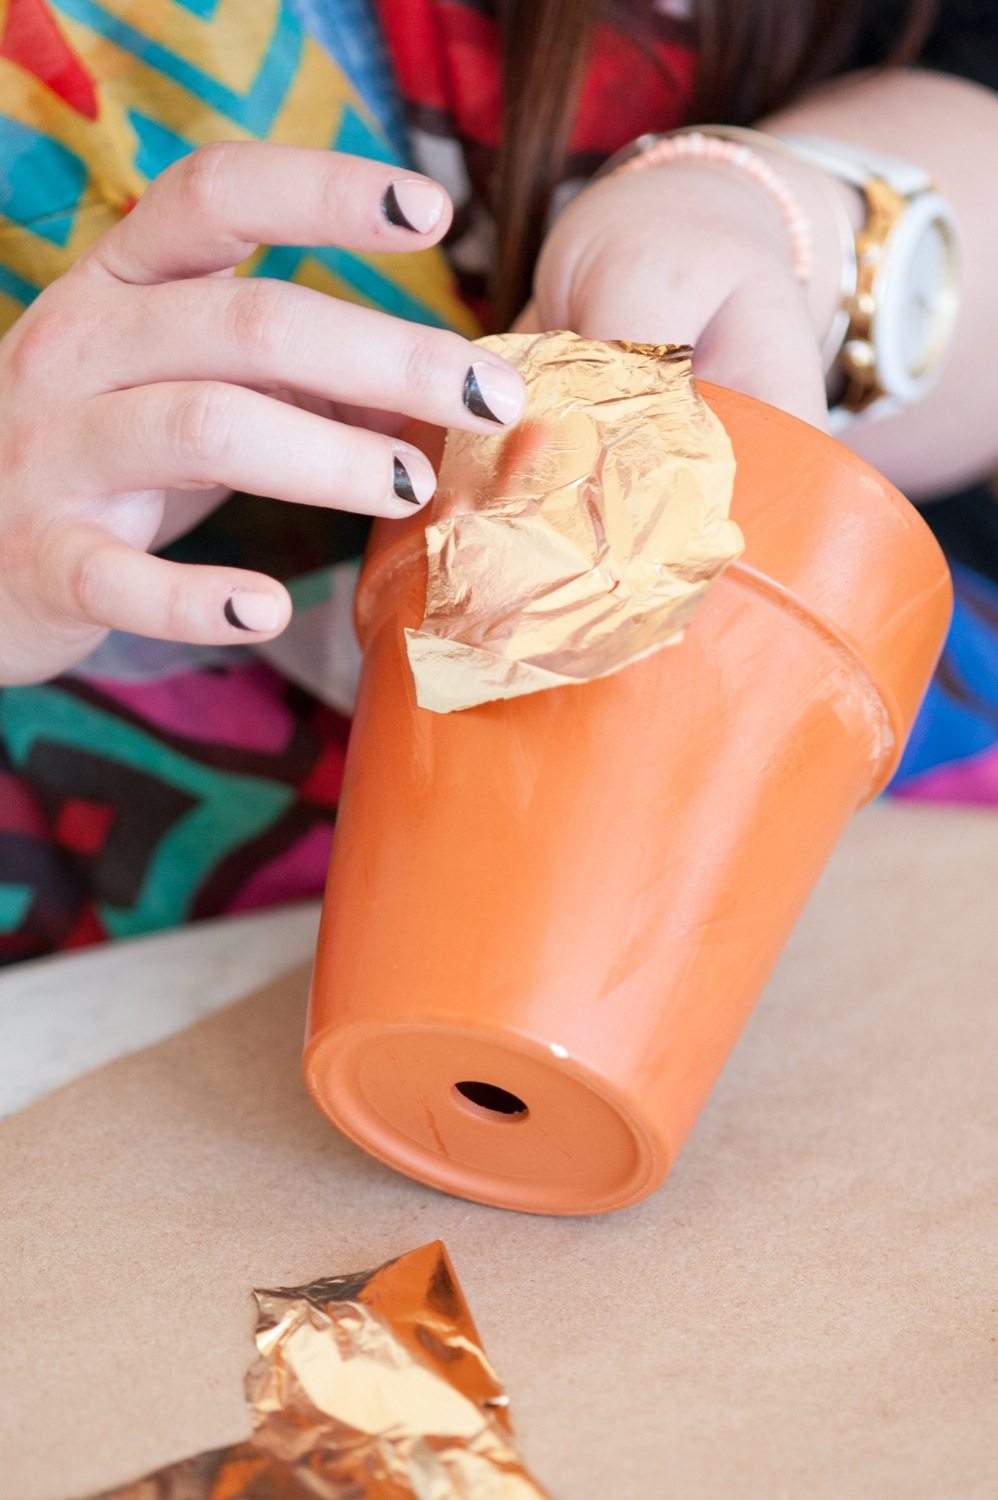
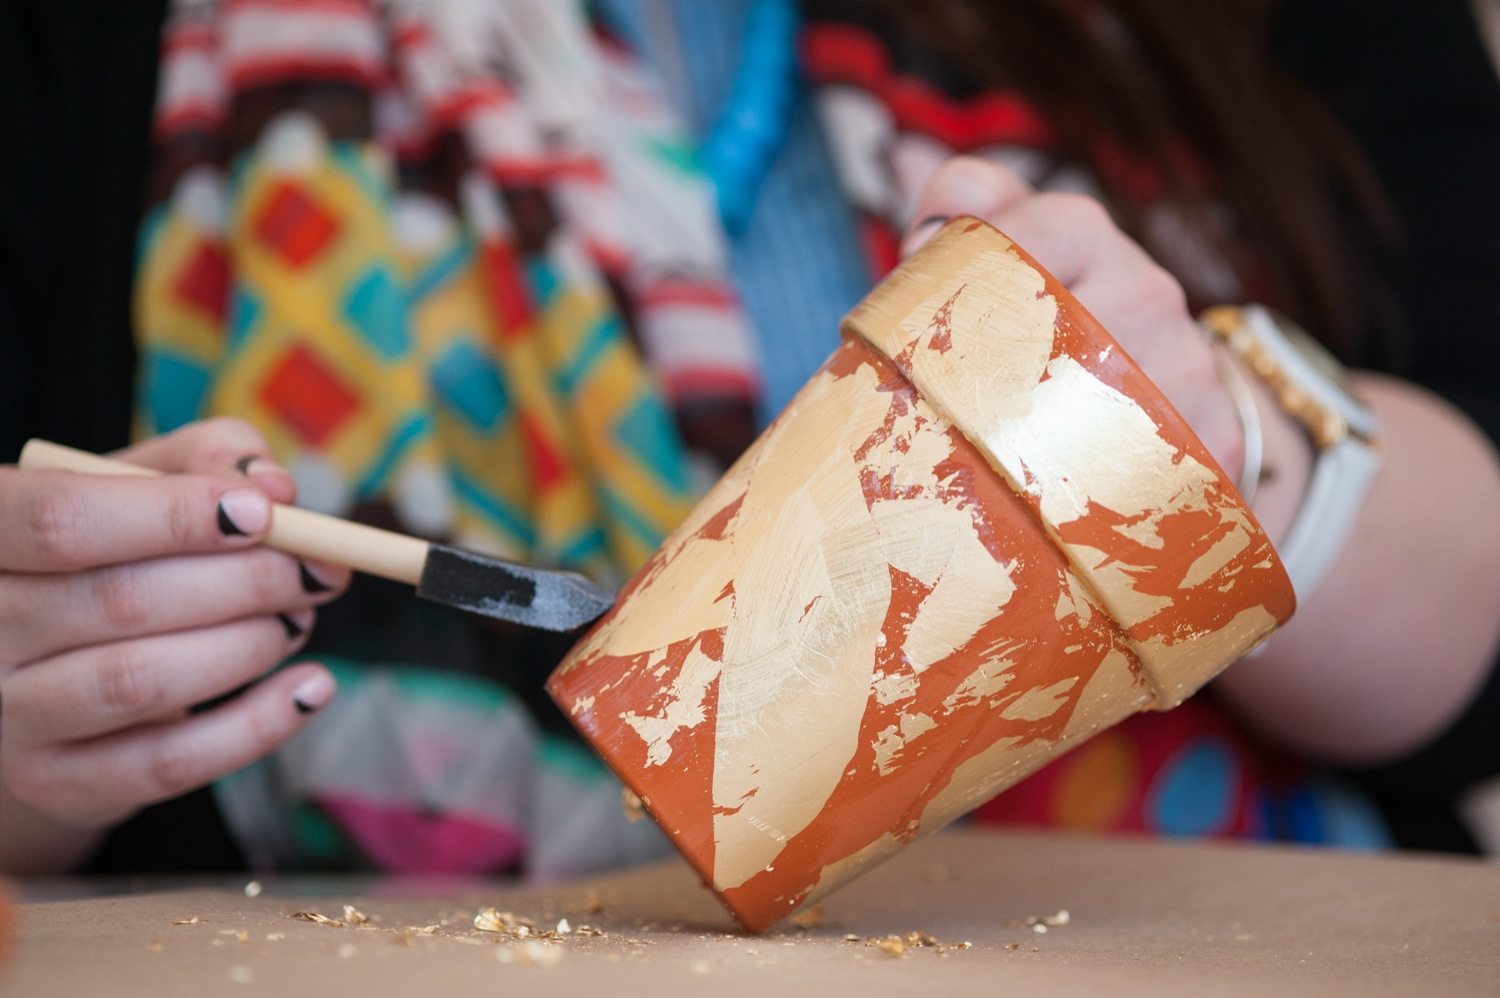
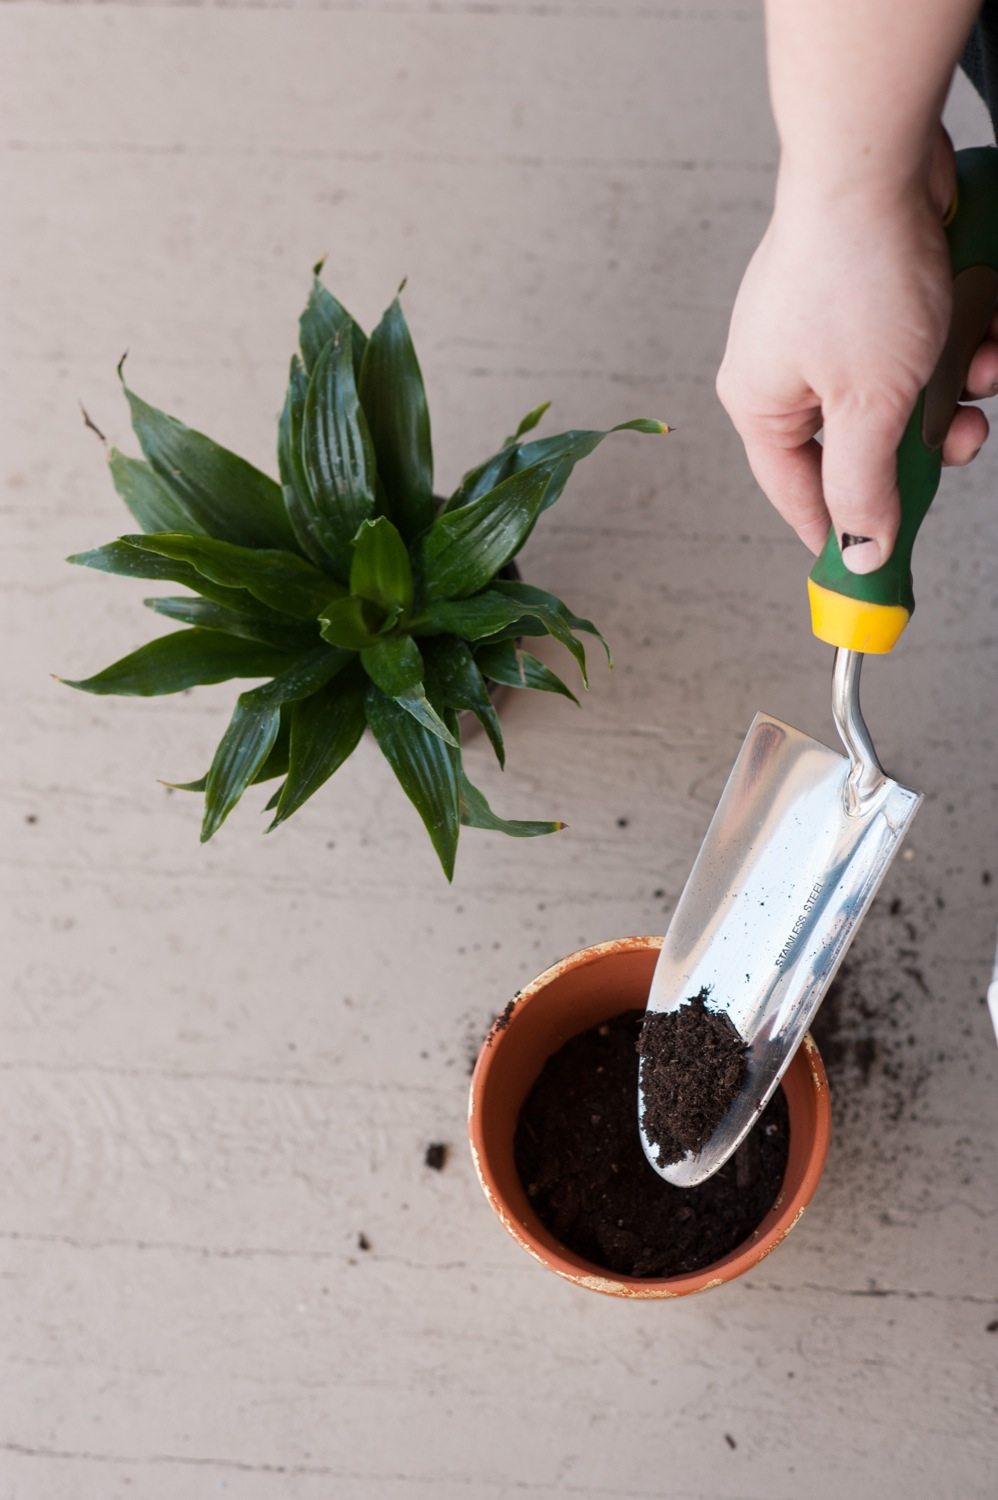
Begin by applying random brushstrokes of gold leaf adhesive all over your planter. I wanted a very random, weathered look so I covered quite a bit of the surface of the pot with the adhesive, but in a very haphazard manner. Keep in mind that the adhesive is very thin so you don’t need much on your brush. I personally prefer a foam brush when working with gold leaf, but basically any type of brush will work. Then, allow the adhesive to sit for about 20 – 30 minutes until it’s tacky, or as specified on the manufacturer’s instructions. From there, it’s time to gold leaf! Carefully lifting one sheet at a time, just place it on the pot wherever there is adhesive, pressing down firmly. If the sheet rips, no biggie! Just use the scraps and repeat the same process until all of the adhesive is covered.
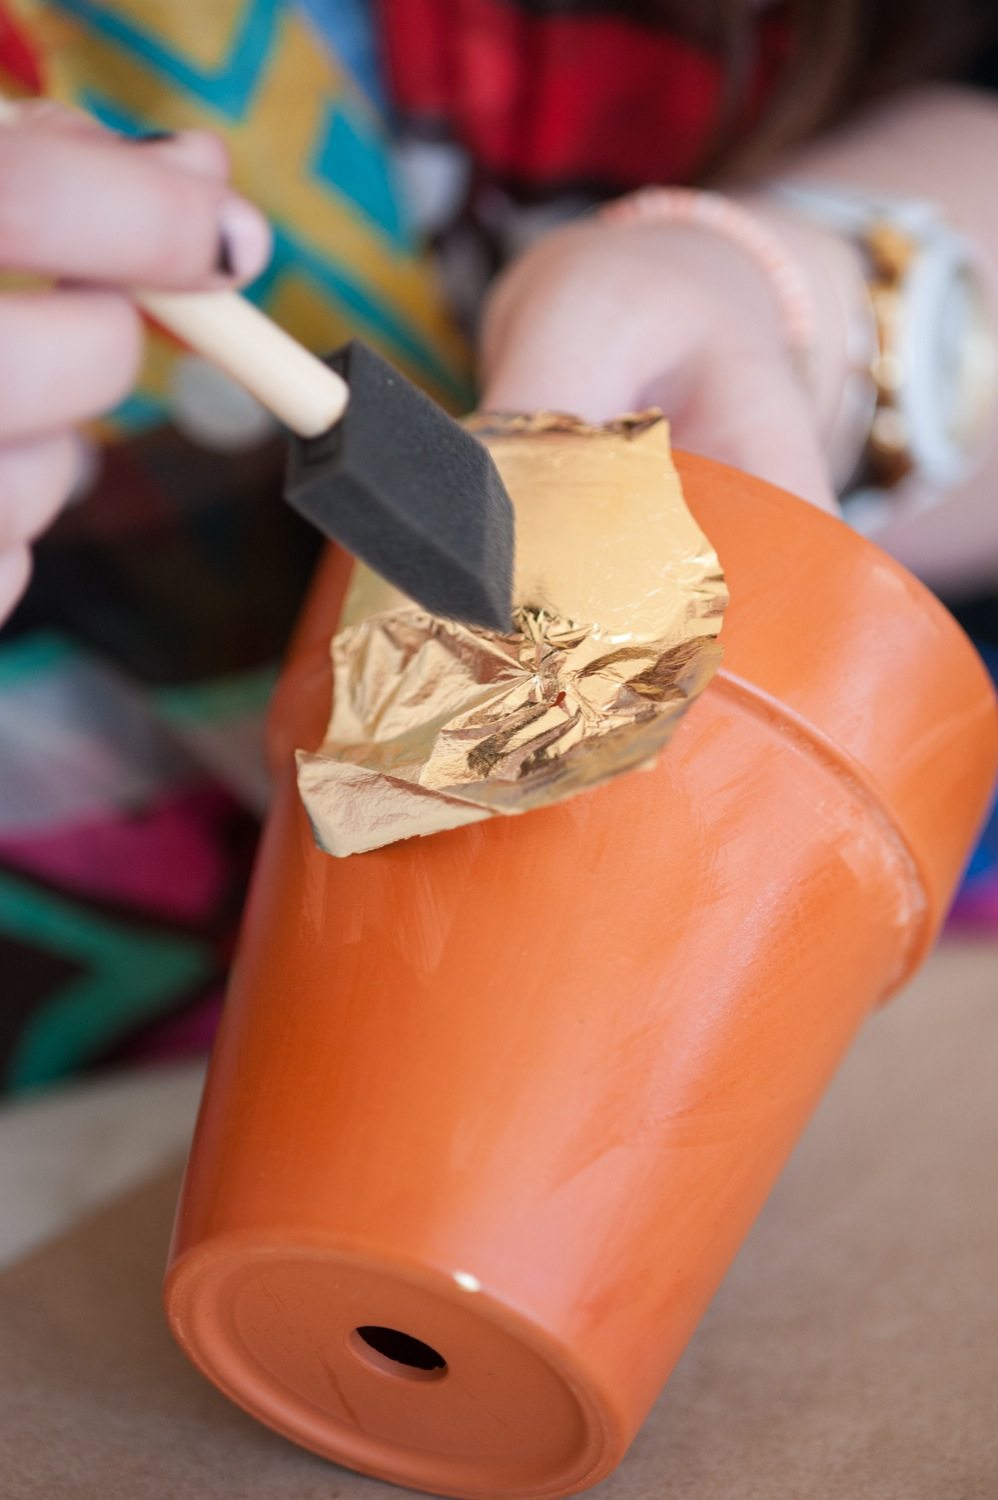
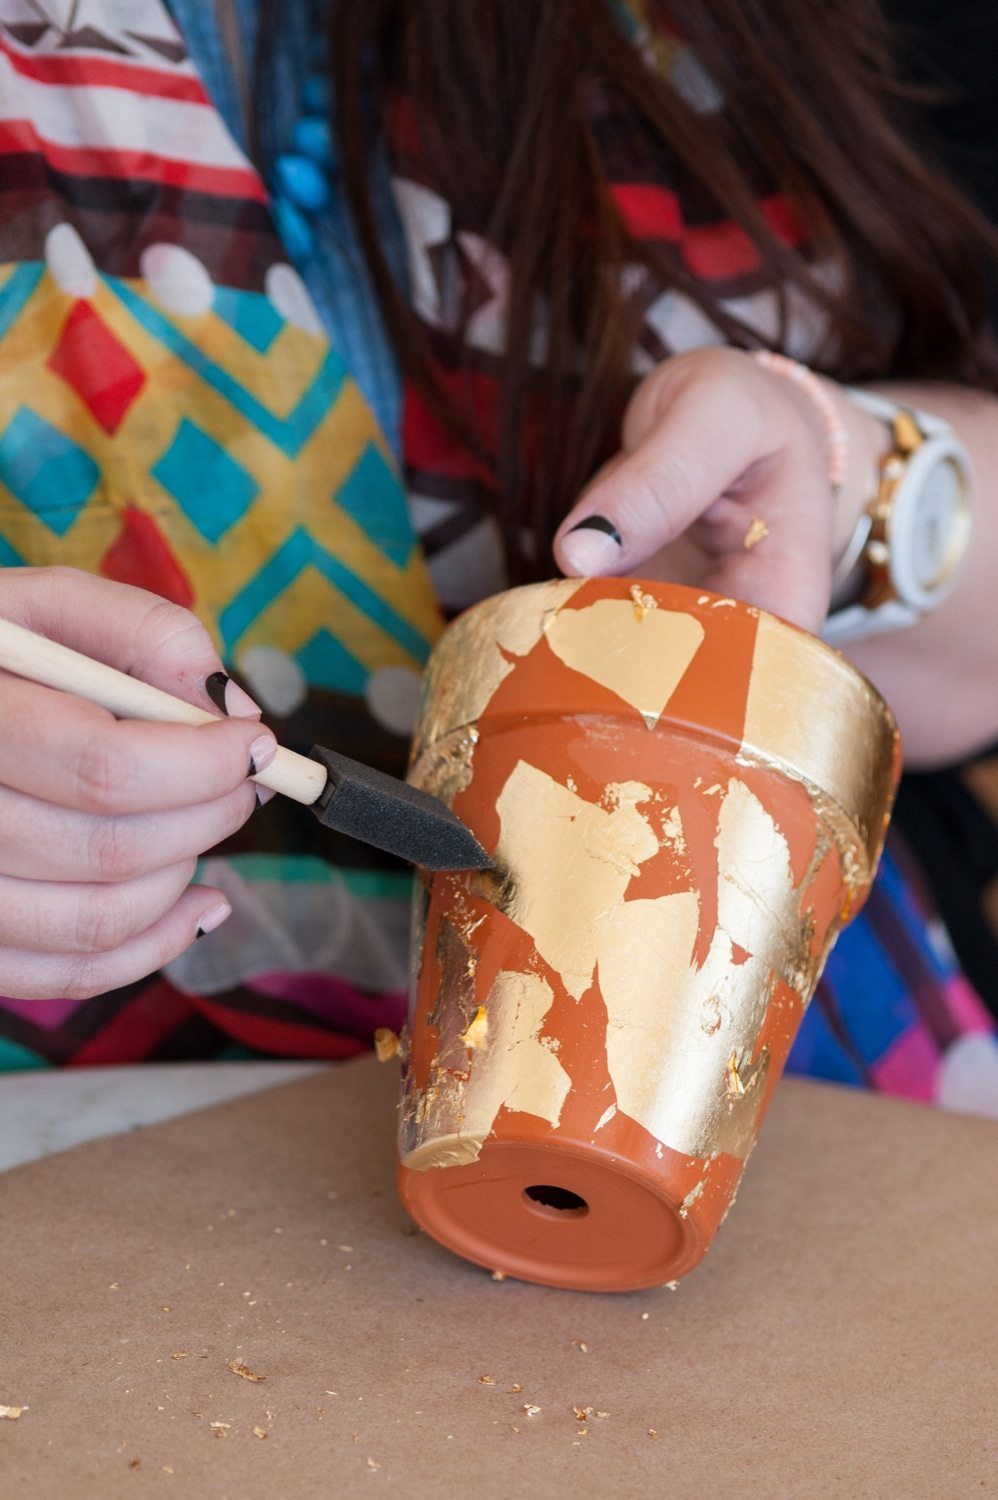
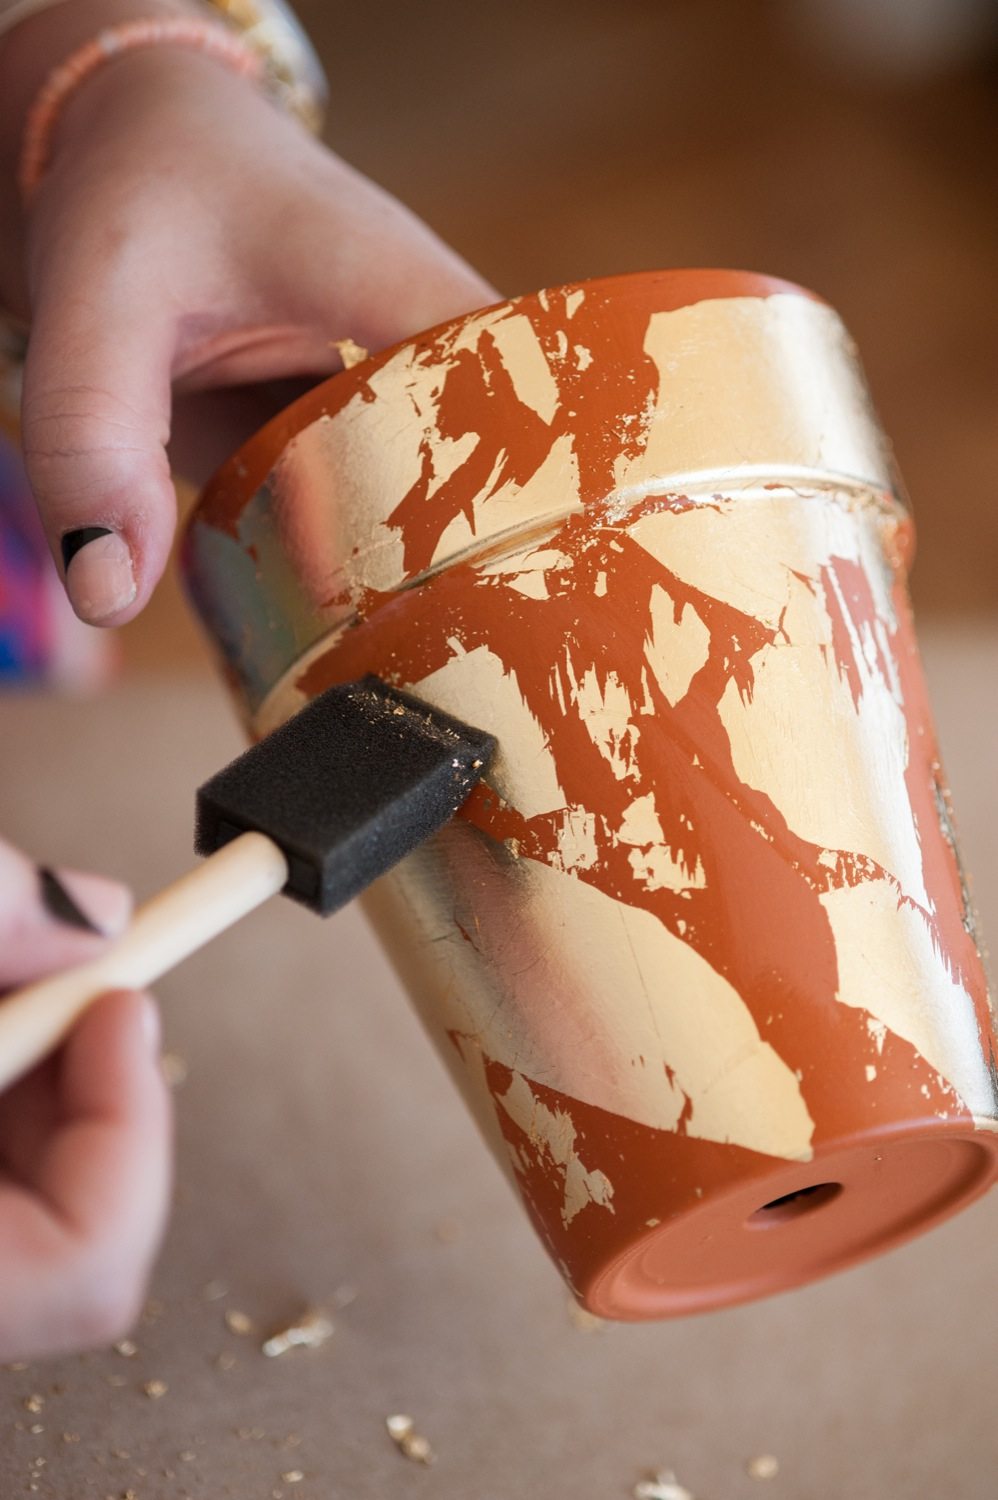
After you’ve applied the gold leaf, it’s time to pick up a second clean brush and start removing the excess! To do this I just like to take my brush and kind of burnish the entire surface of the gold leaf by rubbing it into the surface of the planter with the brush. I’ll get in there with my fingers from time to time, too. No fear! At this point you’ll see extra chunks fall free and the rest will be a pretty smooth finish. I personally find this to be the most satisfying part of working with gold leaf, because this is the stage where it starts to look really really pretty!

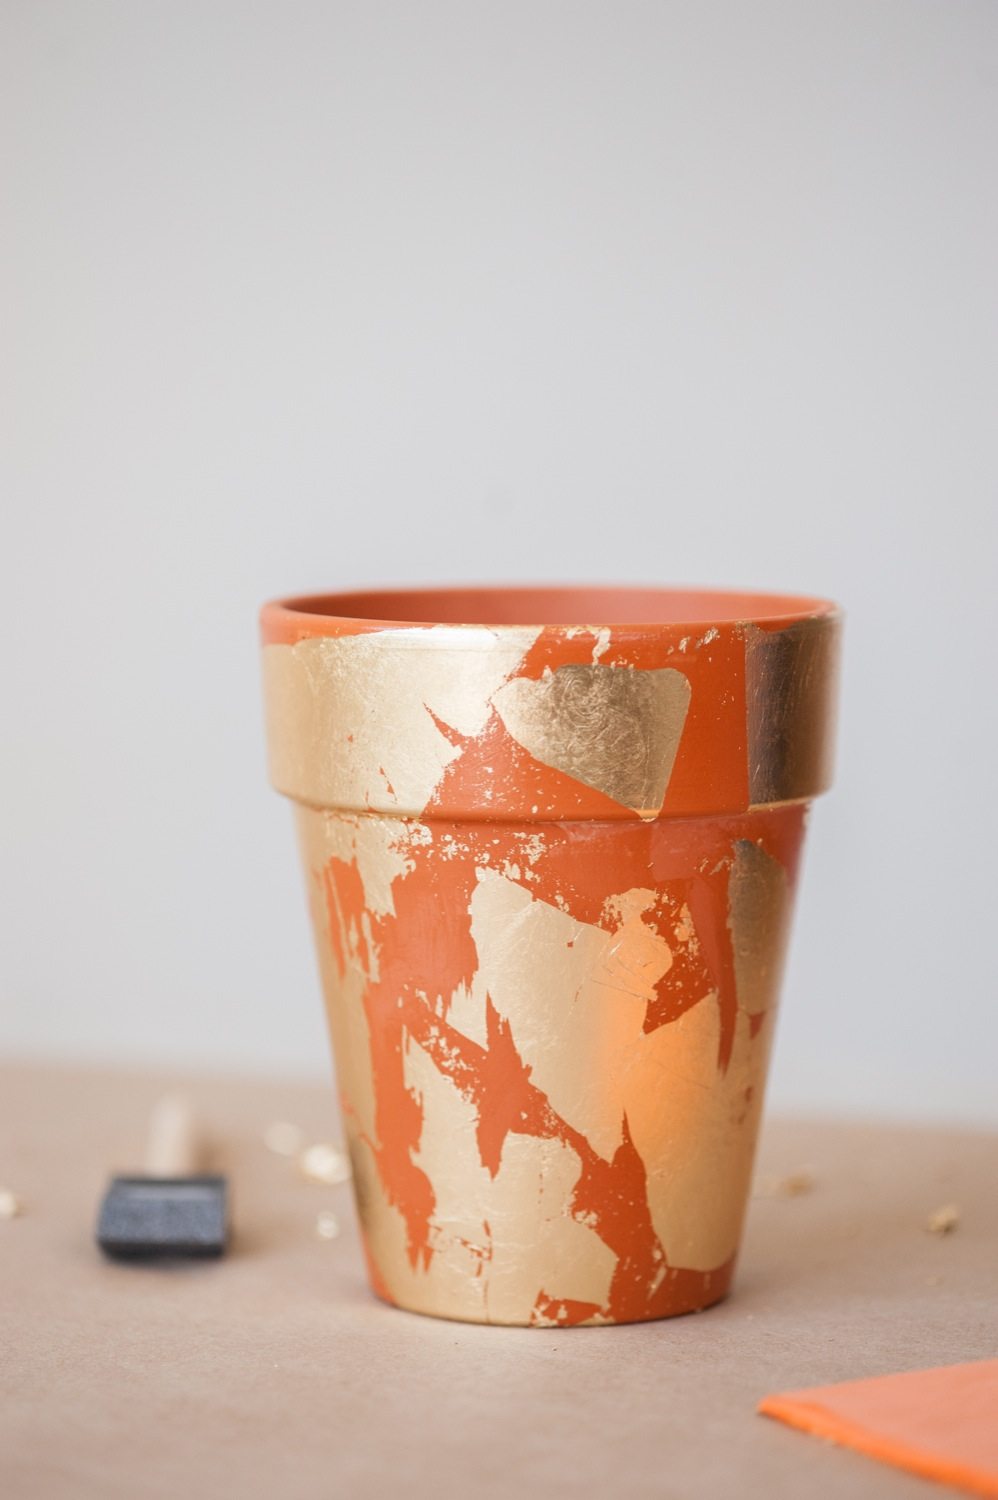
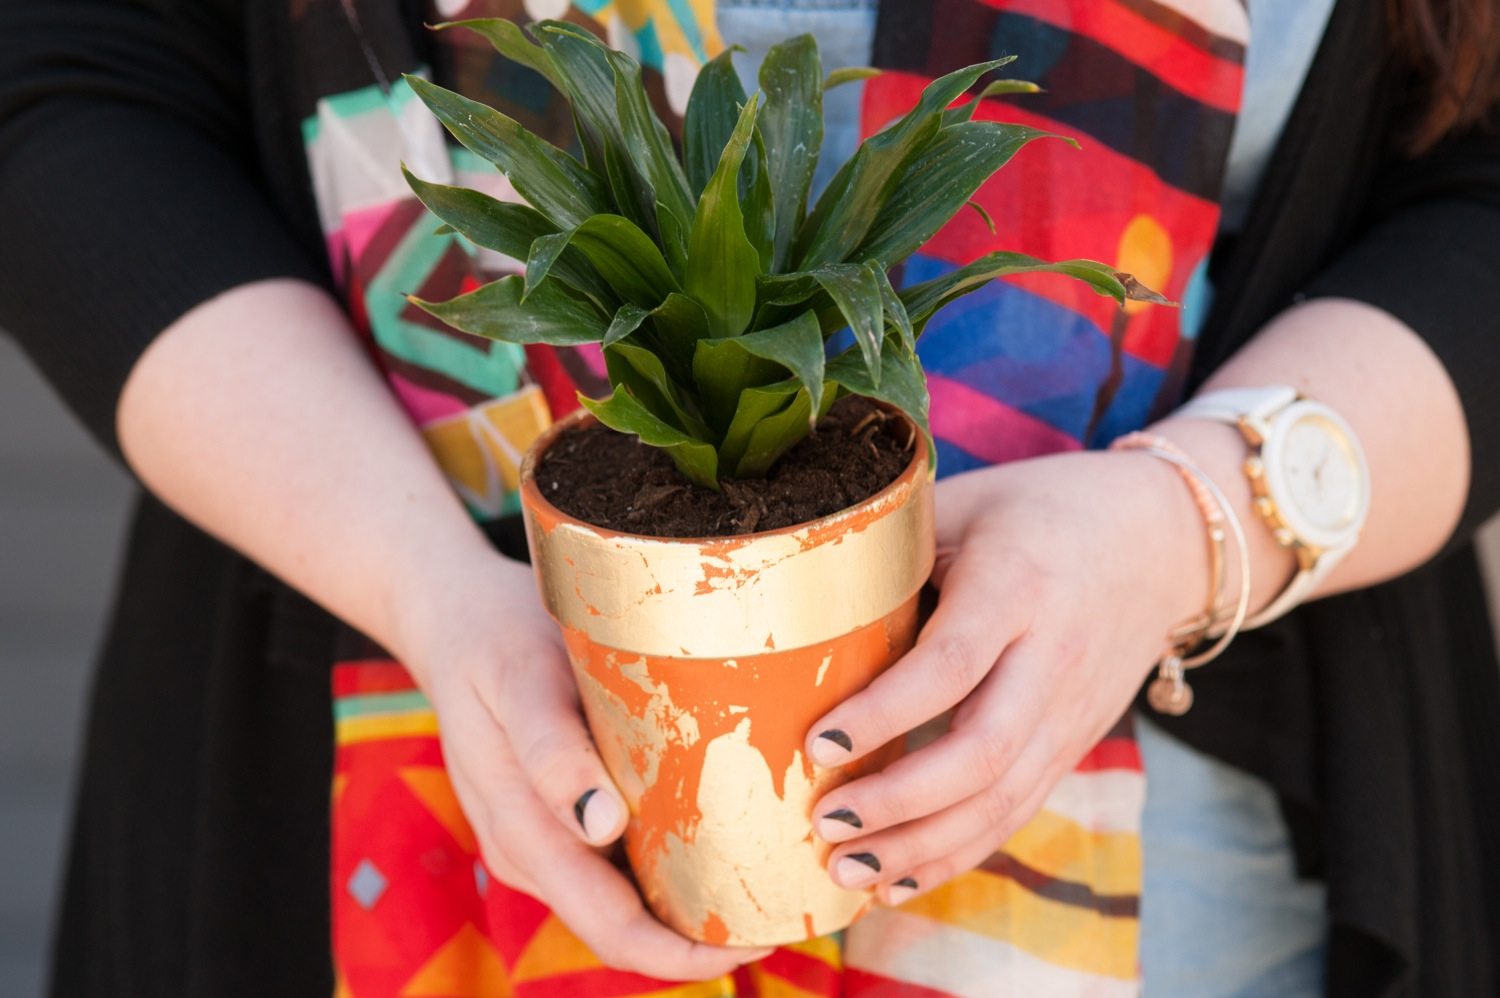
The final step is to give everything a light coat all over with the gold leaf sealer! Then just let it dry completely (overnight preferably) and you’re ready to fill your planters with all kinds of pretty flowers and foliage! I created my planters with the intention to use them inside, but if you’d like to use them outside I’d give everything a second coat of sealer using a spray sealant like those you can find in the spray paint section of hardware stores. Keep in mind even with sealer, they’re likely to weather a bit if they’re kept outside, but I think they’ll look even prettier with time!
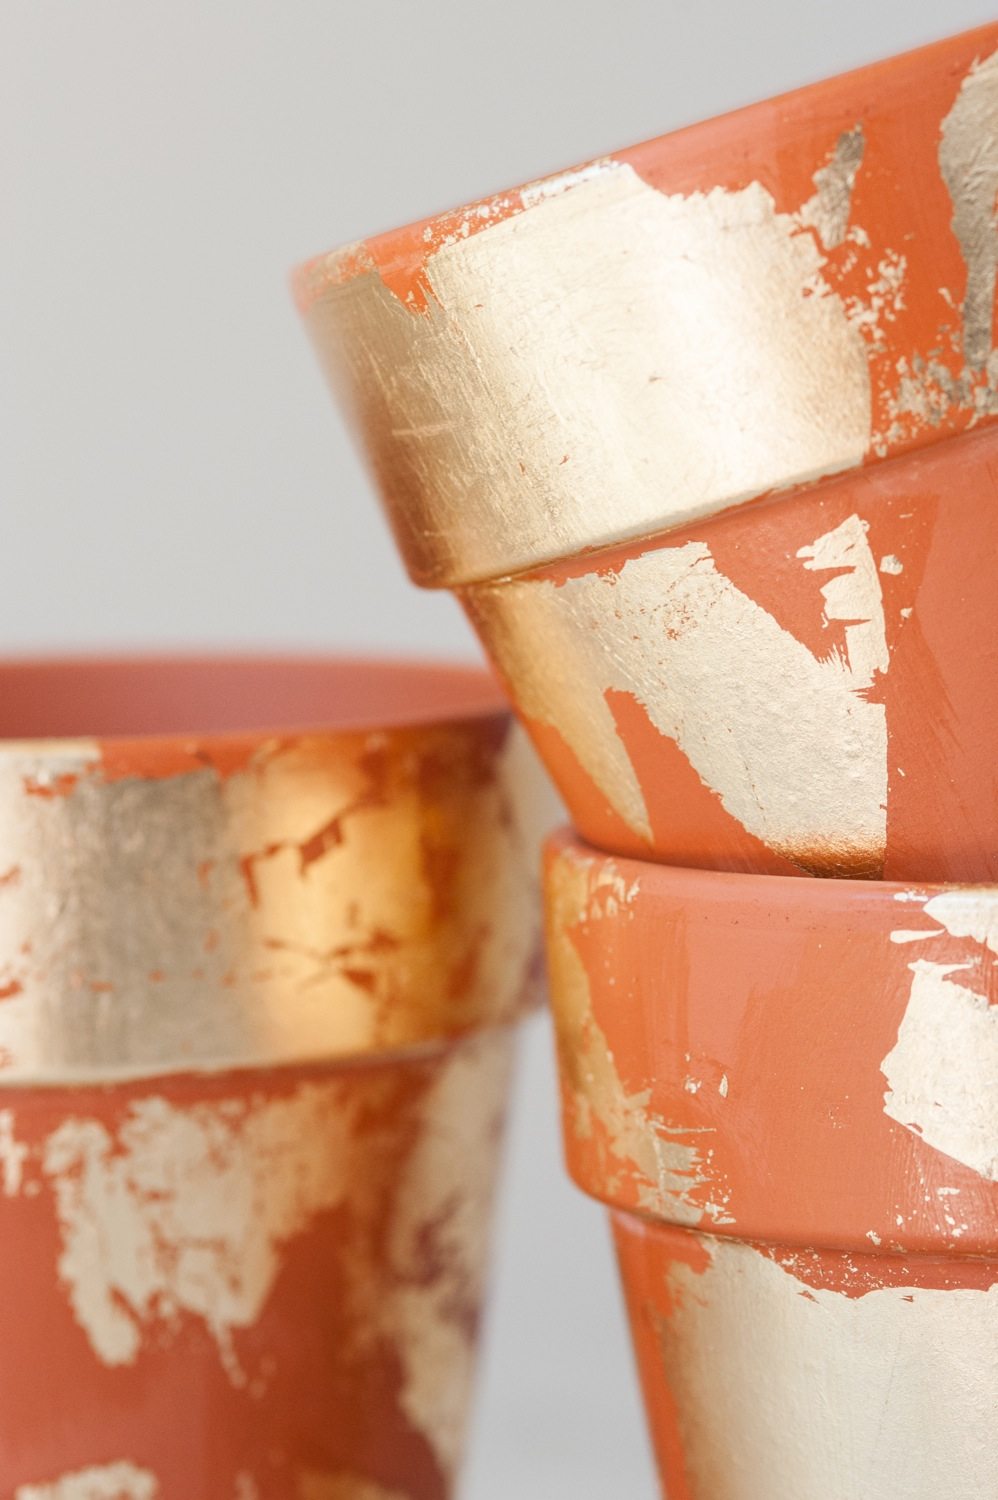
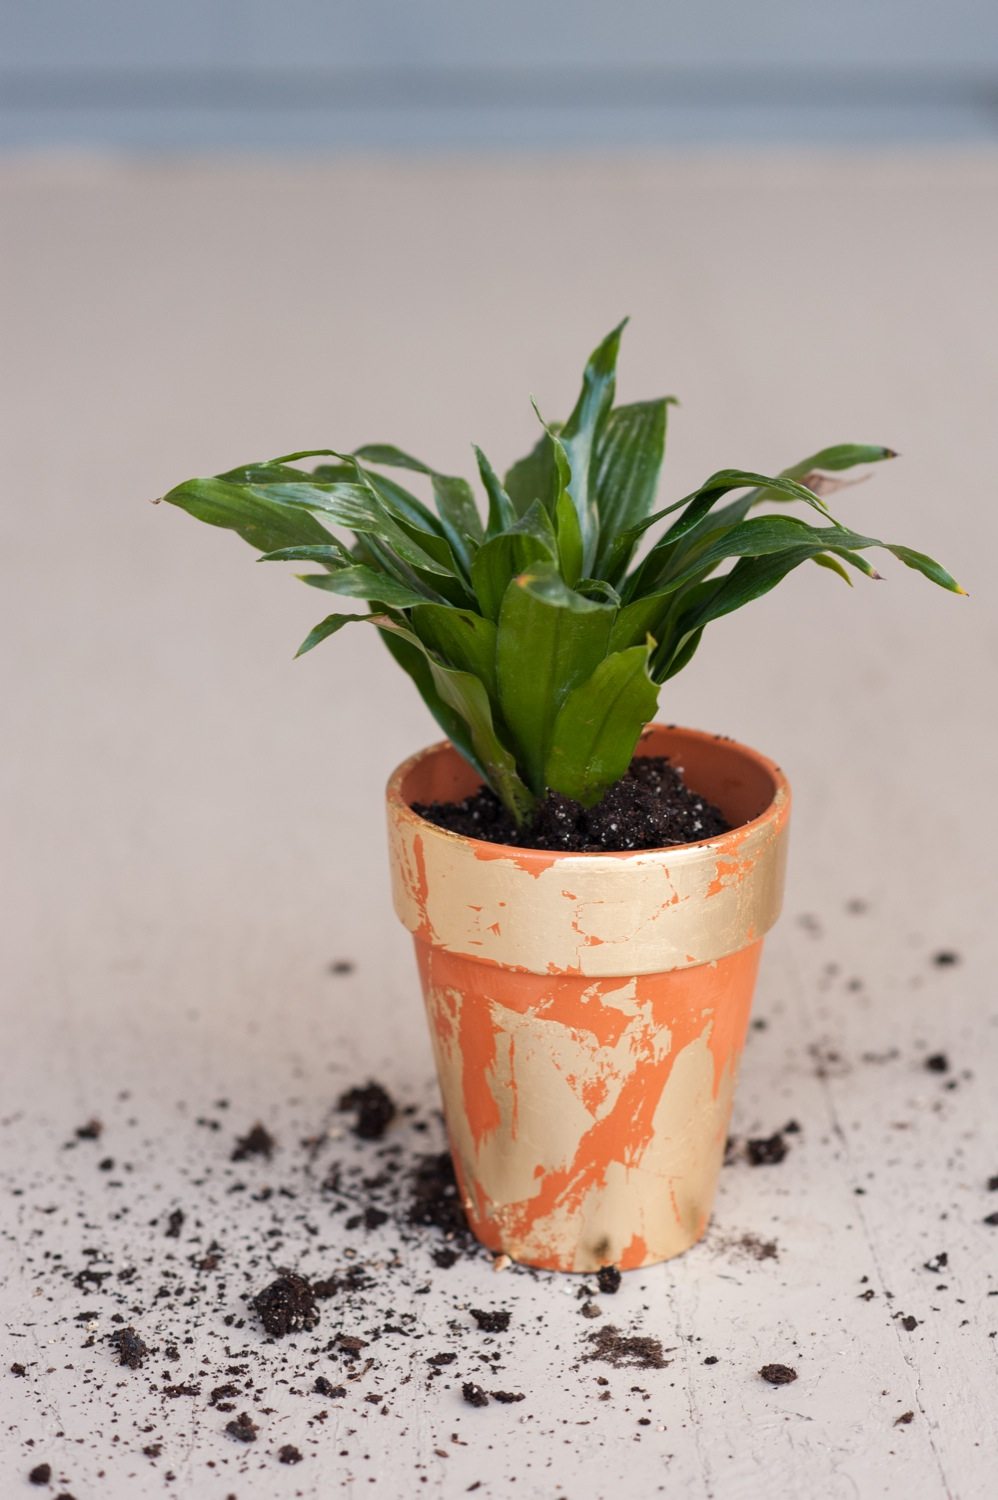
Ok, I know I’m biased, but these are gorgeous, right? Gold leaf for the win, always. Don’t forget, if you make these or any other DIY project, I’d love to have you share with me on Instagram! Use the hashtag #thesweetestoccasion and be sure your profile is public so I can see what’re you’re crafting! xoxo


![]()
[Design + styling by Cyd Converse | Photos by Alice G. Patterson for The Sweetest Occasion.]
The fine print: Please link with love! As with all of our posts, DIY projects featured on The Sweetest Occasion may not be copied, distributed or reproduced without express written permission. Love and links are always appreciated! If you’d like to share this post, please link to this post directly for the DIY tutorial and do not include the instructions in your own post. Thanks so much! xoxo


 Back to Top
Wow..they look fabulous. I should try this too. :) Thanks for this useful idea. I love DIY projects too.
Have a great day! Gabriela
Such a neat effect this gold foil! I love how it looks messy but stylish at the same time. I was a little skeptic about the colour gold and terracotta orange paired toghether.. but in the end you convinced me ;-)
Love
Chiara from One O
Thanks, Blair! xo
How adorable! What a great idea!
So cool! I love the gold leaf effect, I want it everywhere haha
I feel precisely the same way! lol Thanks, Jo! xo
This is absolutely stunning! What a great idea. I’m moving in with my boyfriend in September and I think this will be one of my top DIY’s to do then!
J
Thank you so much, Julieta! I hope you do make them, they’re really simple and are just so pretty! And congrats on the upcoming move! xoxo