


Happy Black Friday, friends! We’re kicking off our little series of DIY gift wrapping ideas today with handwritten wrapping paper that will cost you nothing! I’m pretty sure it’s no secret these days that an upcycled shopping bag makes excellent wrapping paper. The possibilities are endless! So I’m popping over from Lovely Indeed today to hit you up with a fun gift wrap idea to add to your arsenal!
Supplies –
- an old paper shopping bag
- a pen
- scissors
- twine or ribbon
- tape
First, cut open the paper bag in the places where it’s glued or sealed and make a flat canvas. Then measure out how much you’ll need to wrap your package and cut down your paper to size. Here comes the fun part!
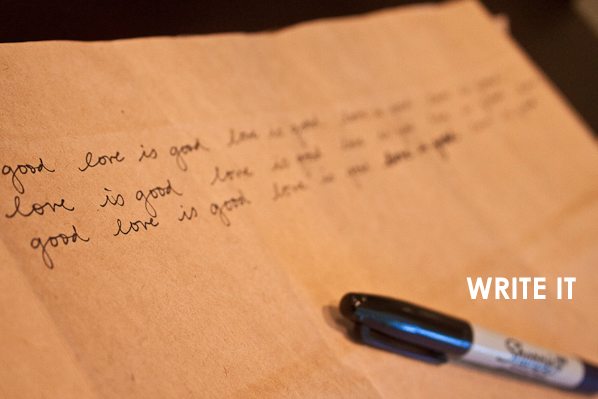
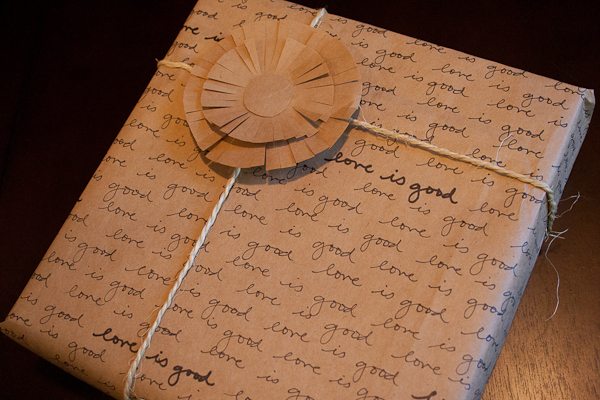
Pick a phrase, any phrase! I chose “Love is Good”, but you can use anything you like. Grab your pen, and start writing the phrase, over and over. Choose any orientation; you can write diagonally, straight across, in concentric circles, etc. Just make sure you check every once in a while that your pattern and text size are remaining consistent. Every so often, write the phrase in a bolder font either by using a thicker pen, or going over your writing a few times.
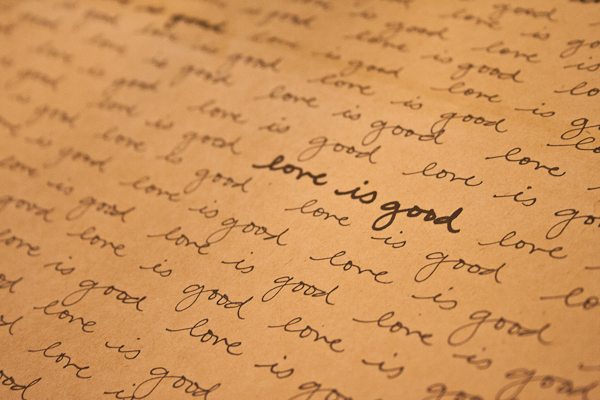
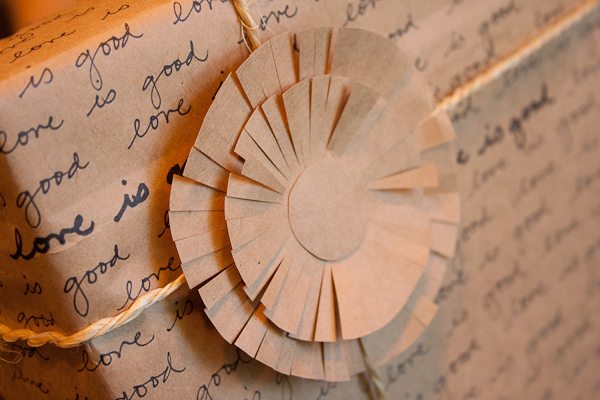
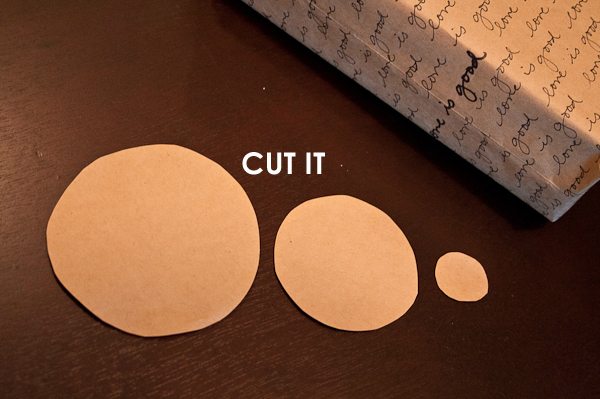
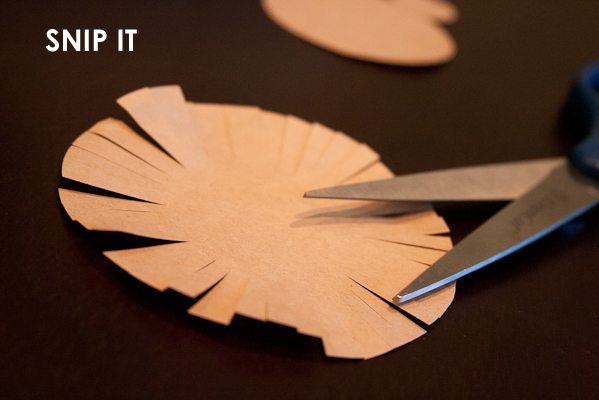
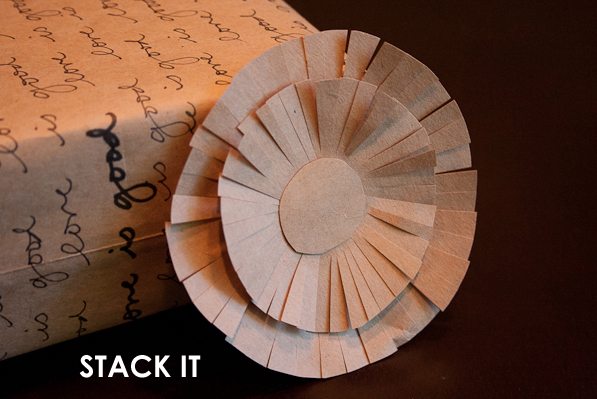
Continue until your wrapping paper is covered with your writing. Wrap your package and set it aside. Cut out three circles: large, medium, and small, in relativity to your package. Fringe the outer edges of the large and medium circles.
Using double sided tape, stack the circles with largest on the bottom and smallest on the top.
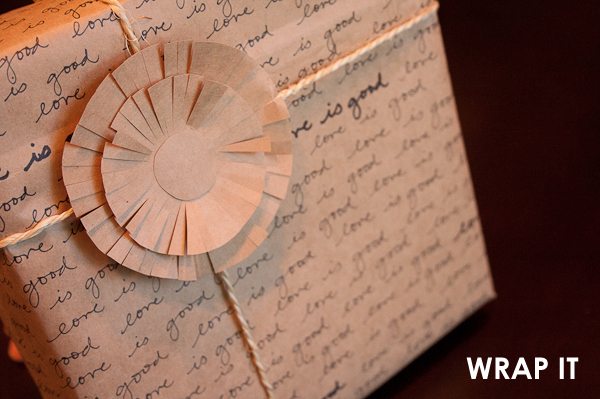
Wrap your twine or ribbon around your package and finish with your fringed bow. Ta-daaaa! One of a kind, handwritten, green, and free. How could it get any better? Don’t be shy about using this for all occasions – change the phrase to “Merry Christmas,” “It’s a Boy,” “You are Wonderful,” or anything you can think of! I’m pretty sure this would brighten any recipient’s day. Until next time! xoxo
{Photos by Lovely Indeed for The Sweetest Occasion.}


 Back to Top
Hei, I really liked your tutorial and I can’t wait to try it!
Jamie, that’s a good idea. One problem I ran into with the paper bags were creases already in the bag. The spot where the handles of the bag are located didn’t separate easily so I couldn’t use that part. Having a roll of the brown paper would be perfect. No creases to worry about! Thanks for the tip.
Katie, I have to agree – the smaller the package, the better! I began writing out my paper and quite 1/3 of the way through because I just couldn’t commit the time to it any longer. I’m thinking if I try it again, make the phrases further spaced… or just doing this for a very small box (as in, jewelry). Fabulous idea still, though! :)
I love it. The bow is so perfect. I am definitely going to do this with some of my Christmas gifts and use red and green sharpies to do the writing.
Instead of hunting for brown paper shopping bags, you can just buy brown postal warpping paper. It’s on a roll almost double or triple the size of normal wrapping paper and is about half the price. Scotch brand makes some, as do many crafting companies.
I REALLY love this! I’m not very big on DIY but this is simply brilliant. :)
I usually don’t comment on anyone’s page, but I had to on this one. Love this idea! And recyclable too! I’m sharing this on Pinterest, thanks so much for posting. Bookmarked your page so I can come back and explore.
I tried this for a baby shower this past weekend. I chose “Little baby Cole” as my phrase. It was a hit at the shower! I just wish I had chosen a smaller package. It was a lot to write on a package the size of a tshirt box. I loved the idea though. Will definitely use again.
I really love your fantastic ideas!