


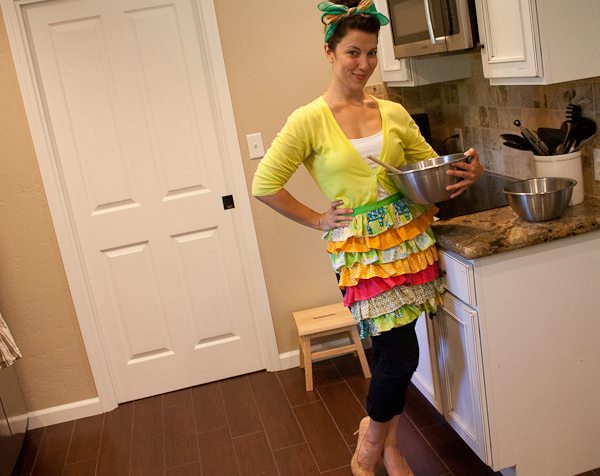
Oooh la la! It’s Chelsea from Lovely Indeed, cooking up a cute little DIY for you! I’ve been seeing these darling little shortie aprons lately in some of my favorite shops, so I decided to figure out how to make one and share it with you gorgeous people. Let’s make an apron.
Now don’t be scared – this is a sewing project. But being a beginner seamstress myself, I can attest to the fact that this is completely doable, and totally fun.
Supplies –
- various colors and patterns of cotton fabric
- grosgrain ribbon
- sewing machine with thread
- scissors
- measuring tape
- iron
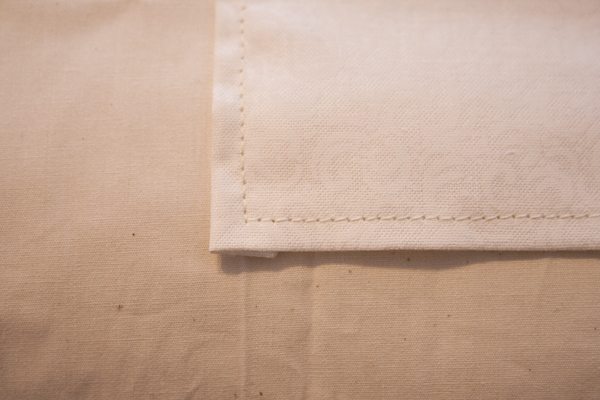
Start by cutting and hemming all of your pieces. From one fabric, cut a piece 22″ by 18″. Make a 1/4′ hem on all four sides of this piece by folding over a 1/4″ of fabric on all four sides, ironing it down, then sewing it down with a straight stitch. This will serve as the base for your apron.
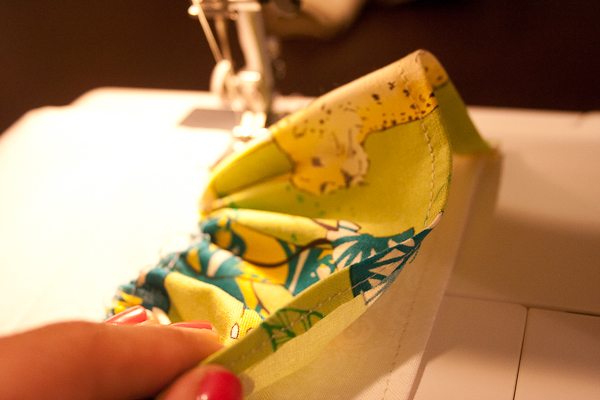
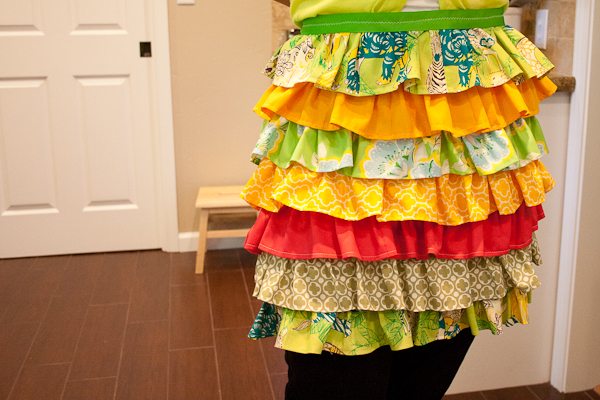
Decide which fabrics you’d like for your ruffled layers, and cut out 7 pieces that are each 44″ long and 3 1/2″ wide. Make a 1/4″ hem on each of these pieces on three sides (both short sides and the bottom long side).
Then, ruffle each of these pieces with the following method: Set the straight stitch on your sewing machine to its longest length and sew across the unhemmed side of each piece of fabric. Leave a long tail of thread at both ends, and don’t backstitch on either side. Then, tug gently on the top thread with one hand while gathering fabric with the other – it should start to create a ruffle. Work the fabric together until the ruffle is about 22″ across – long enough to span the width of the apron base.

Next, decide the order of your fabric ruffles and pin the bottom ruffle onto the apron base, lining up the two hems. Readjust the stitch length on your machine to a medium length. Sew this ruffle down with a straight stitch.
Pin the next ruffle above the bottom one so that the hem of the second ruffle will hide the place where the bottom one is stitched to the apron base. Sew this ruffle down.
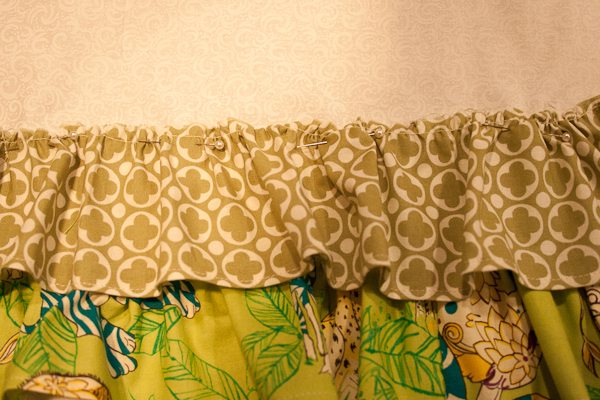
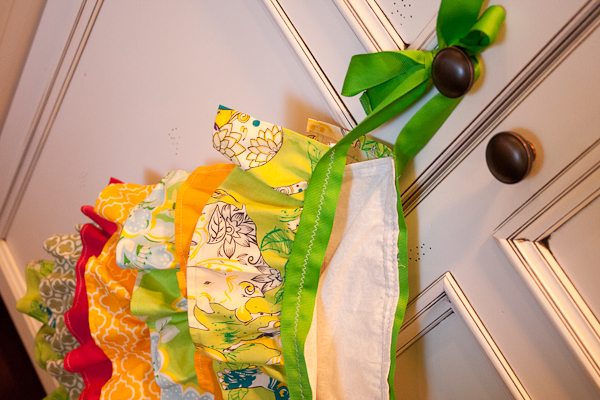
Repeat this process with each ruffle until you reach the top hem of the apron, which should line up with the top of the final ruffle.
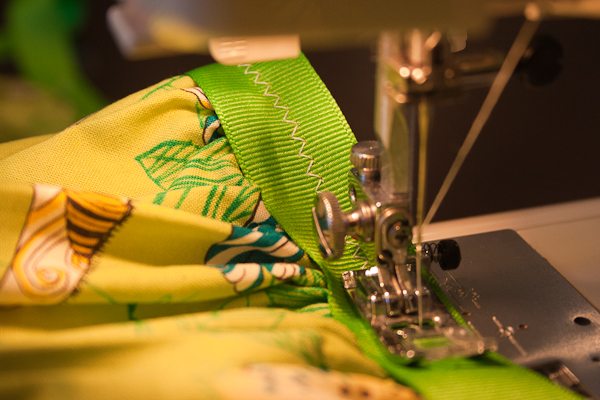
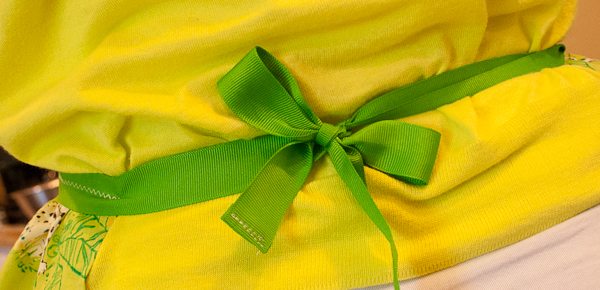
Take a length of grosgrain ribbon long enough to wrap around your waist and make a bow. Hem the ends of the ribbon so that it doesn’t fray. Pin the ribbon down over the stitched portion of the top ruffle and sew the ribbon over it with a zigzag stitch. After the ribbon is sewn down, trim any stray threads.
Congrats! You did it! See? Not so tricky, is it? I’m thinking this apron would make an adorable gift for a bride who loves to cook or bake, or even a fantastic little hostess gift. Heck, I might even make another one to keep for myself. Happy sewing! xoxo
{Photos by Lovely Indeed for The Sweetest Occasion.}


 Back to Top
I started making this tonight and am happy to say… it is pretty easy. A LOT easier than I thought… Can’t wait to make some more and to Jasmine above… I didn’t think I could sew either. :)
If you take a cigarette lighter and with the flame just bearly heat the ends of the grosgrain ribbon, you don’t have to hem it. It’s polyester and the ends will “melt” together and won’t fray. I use it a lot and don’t ever have to hem it. Makes working with grosgrain a lot simpler.
Thanks for the tutorial. Can’t wait to make this apron.
CUTEST THING EVER!! Great job!
This is seriously the cutest little apron I’ve ever seen! Fabulous DIY!
.-= Natalie {Bayside Bride}’s most recent blog post: Nautical Invitation Suite =-.
Cute idea! This is adorable!!!
Cute apron! I would make one of these if I could sew!
I am obsessed with aprons! I want to try making this!
.-= Alicia@Charitywedding’s most recent blog post: Tuesday Shoesday: Make a Statement =-.
These are really cute gift ideas. Thanks for sharing the instructions.
oh wow, this is too cute!
Holy cow this is cute! How adorable are you?! Love this!
I have been searching all over for an apron I have in mind and can’t find it! The one I did find was out of my price range (http://www.etsy.com/listing/53989741/vintage-inspired-fashion-apron-linen). Maybe I can try to make the half version myself now. Thank you!