


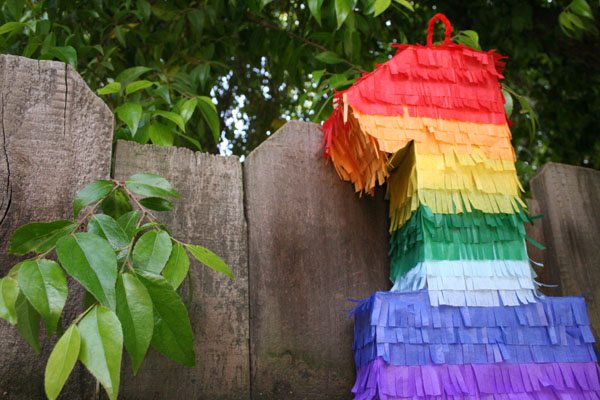
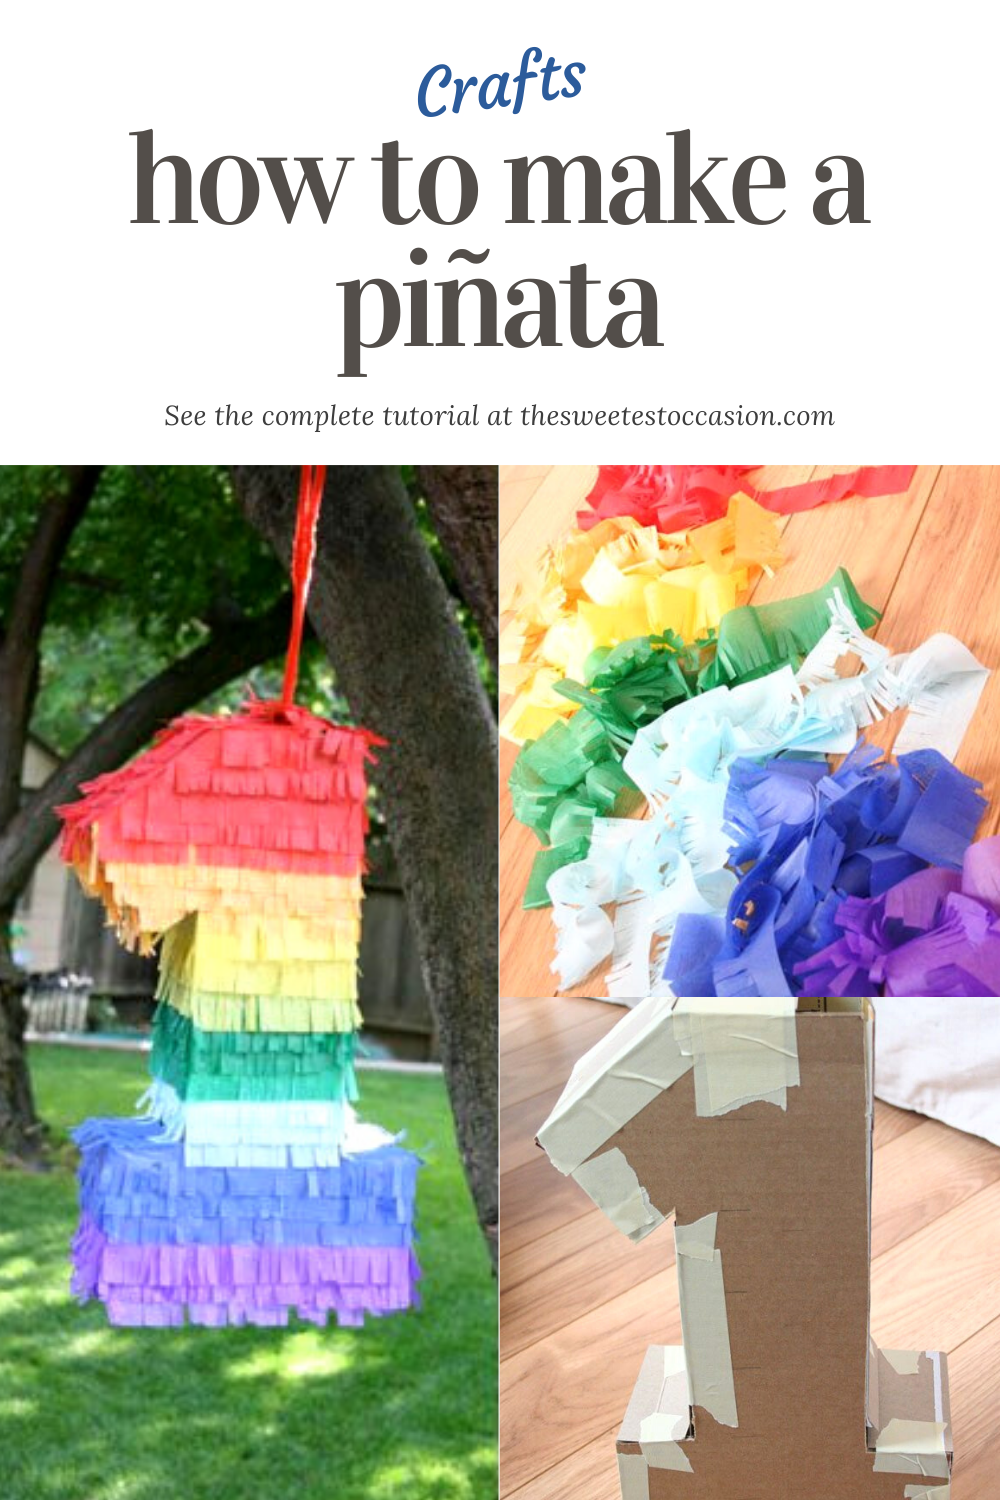
This easy tutorial will teach you how to make a piñata for a first birthday or any other celebration. You can make your own piñata using very basic supplies such as cardboard, tissue paper and glue. It’s sure to be a hit at your next party. Enjoy!
This tutorial for how to make a piñata was originally crafted for The Sweetest Occasion by DIY queen Chelsea Foy of Lovely Indeed. She made this rainbow colored number 1 piñata for her niece’s first birthday.
Since then loads of you have decided to make your own using Chelsea’s tutorial, which you can make with very simple supplies.
The best part about making your own piñata is how affordable the supplies and materials are! Plus you can customize the colors to suit any occasion.
To Make Your Own Piñata, You Will Need:
- Cardboard – Sturdy cardboard that is large enough for your desired shape or number
- Empty cereal box – To create sides and the flap for filling
- Tissue paper – Any color or combination of colors you’d like to use
- Masking tape – Inexpensive basic masking tape
- Scissors – Craft scissors or paper scissors for making fringe from tissue paper
- Glue stick – A basic craft glue stick will work great
- Pipe cleaners or thick twine – Used to close and hang your masterpiece
How to Make a Piñata:
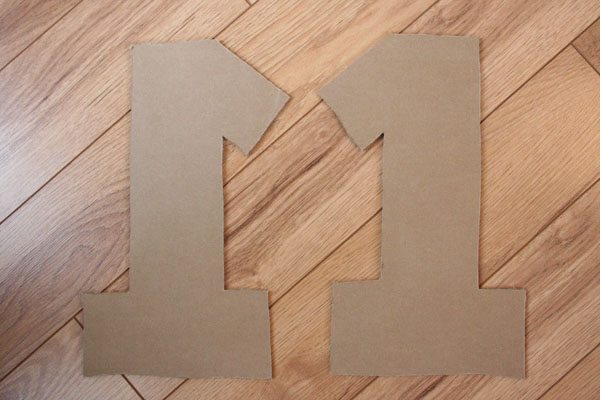
1. Start by cutting your desired shape or number out of your cardboard. Cut out two identical pieces of your shape. This is a number 1 piñata for a first birthday party, of course!
The dimensions are entirely up to you. This number one is about 18 inches tall.
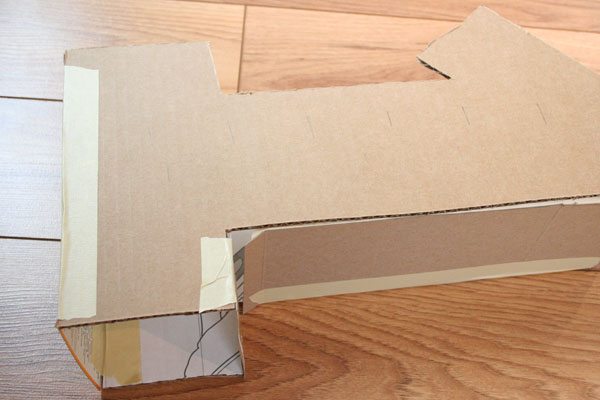
2. Next, cut out strips of your cereal box to use on the sides of your piñata. For this 18-inch tall piñata, the strips that were three inches wide.
How wide you cut these strips will determine how deep or thick your piñata ends up being.
For a larger piñata you may want to go wider, and for a smaller piñata you may want to make it a bit more narrow.
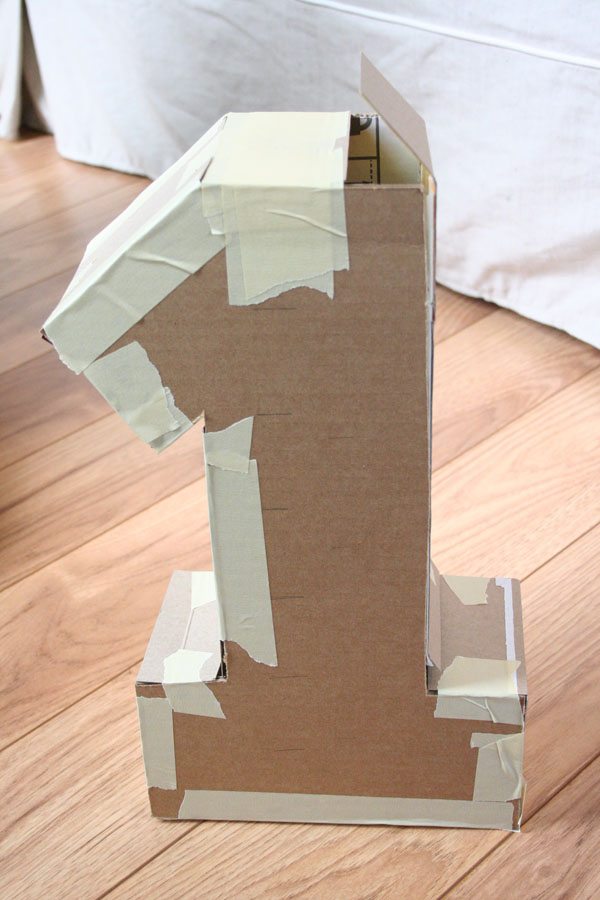
3. Assemble your piñata shape by using masking tape to attach the cardboard shapes and cereal box strips together. Match the edges neatly and use plenty of masking tape to be sure that the piñata is fully closed.
The masking tape will also help to reinforce the piñata since it will need to hold the weight of whatever you stuff inside. Be sure to leave a flap open and untaped at the top of your piñata for filling!
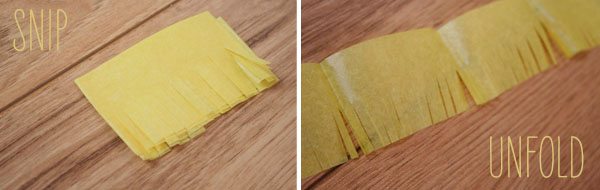
4. Next, prepare your tissue paper to cover your piñata. To do so, leave the tissue paper folded as it comes in a fresh package, and use your scissors to cut a two-inch-wide strip of folded tissue paper.
Then create fringe buy snipping about halfway up one side of the folded tissue paper. Unfold, and you should have a long strand of fringed tissue. Repeat this process with as many colors as you’d like!
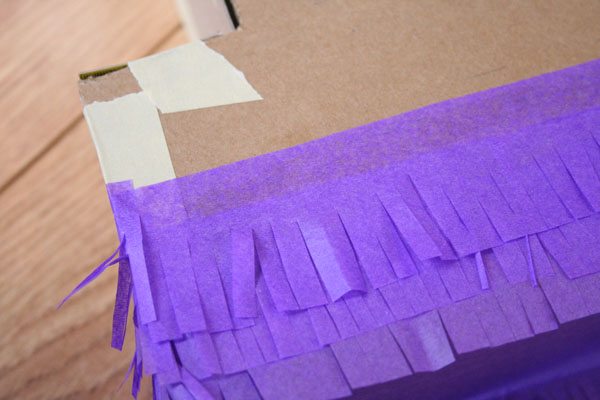
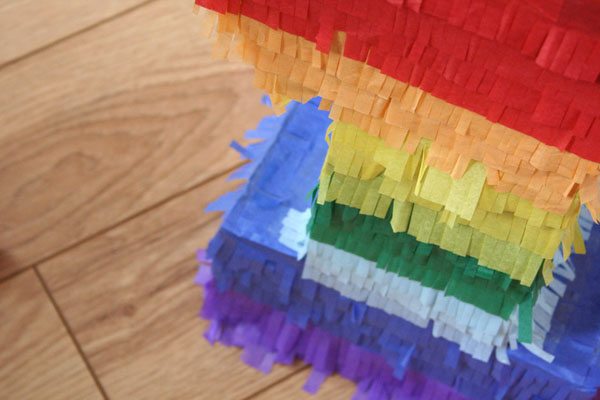
4. Once all of your tissue is fringed and ready to go, grab your glue stick and start applying the fringe to the piñata form, starting at the bottom and working your way up.
Remember that you will need to overlap the tissue so that the only portion that shows is the fringe.
The un-fringed part is what you will glue down to the cardboard and then it will be covered by the next strand of tissue paper that gets attached over top of it.
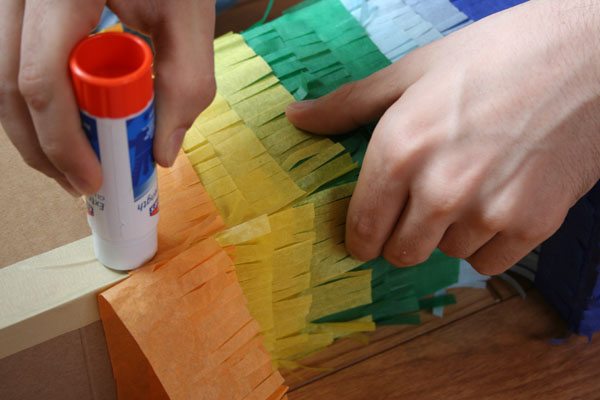
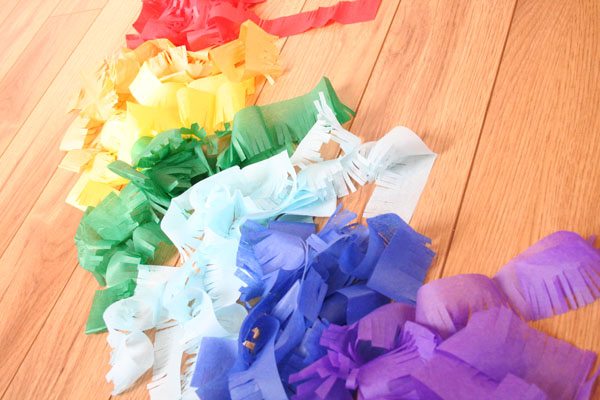
Repeat this process as you are working your way up the piñata. You can create rainbow stripes like shown here, or customize the colors you choose based on the birthday party theme or the occasion you’re celebrating.
You can opt for a single color to keep thing simple. A monochromatic piñata with tone-on-tone shades of one color would also be super fun – or even an ombré piñata!
There are so many options when you craft something instead of buying it, which is half the fun.
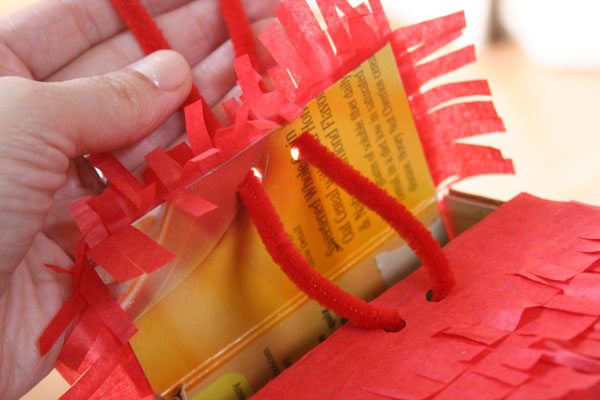
5. When you’ve fully covered the piñata with fringe, cut small holes on the open flap at the top, and corresponding holes on the top in a section that is taped down.
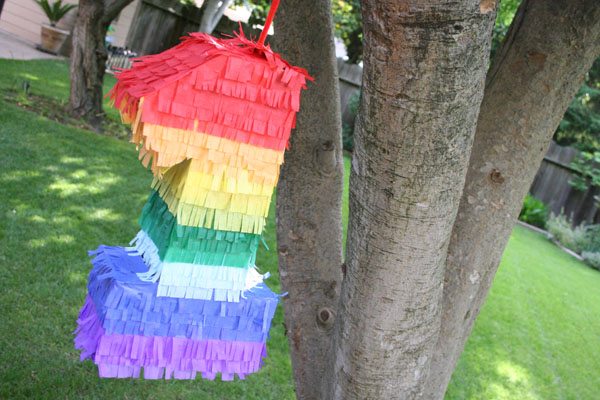
String a pipe cleaner or twine through the holes to seal the top of the piñata. You can then use the pipe cleaner or twine to hang it from a tree branch!
After you’ve sealed it, string it up and admire! You can use them purely for decoration, or put it to use – grab a bat or a stick and knock it around!
This little project is an absolute blast to make, and even more fun once it’s done. Have a ball!
Tips for Making a Piñata:
- When planning supplies, keep in mind that for a piñata this size (18″ tall) and using 2″ strips of fringe, you’ll need approximately the same number of fringe strips as two times the height – so in this case, about 36 strips of fringe.
- If you don’t have cereal boxes handy, any thin cardboard can be substituted
- Piñatas are quite simple to make, but the process can be a little time consuming, so plan ahead and give yourself time when crafting
- Don’t worry about perfection! Piñatas are be nature quirky and fun – and they’re meant to be broken! So don’t sweat making it 100% perfect.
A Few Fun Piñata Filler Ideas:
You can fill a piñata with a variety of small prizes and tailor them to the age group attending your party. Should you happen to be making this for an over 21 crowd there are a few ideas below for the adults, too, which are marked with an asterisk.
- Little chocolate bars
- Lollipops
- Toy cars
- Mini bubbles
- Key chains
- Packages of fruit snacks
- Cocktail peanut
- Candy necklaces
- Rolls of stickers
- Mini bottles of liquor*
- Glow bracelets
- Ring Pops
- Bottle openers*
- Gift cards (a couple $5 or $10 gift cards to sweeten the pot)
- Gum
- Tea bags*
- Movie tickets
- Drink chips for a local pub*
- Mardi Gras beads

Looking for fun birthday party ideas? Learn how to make a pinata perfect for a first birthday party or any other special occasion!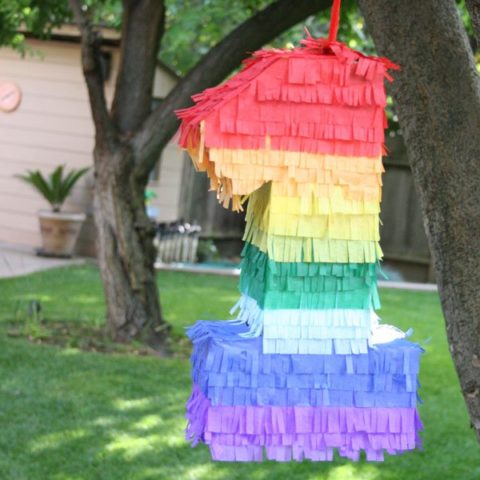
How to Make a Pinata
Materials
Instructions


 Back to Top
I know that making your own piñata is customizable. Your dimensions are 18” in height and depth is 3” between front and back of the #1. What are the width dimensions of the #1 in three sections, the base, the body and the tip of the #1? Hope this makes sense. Thanks in advance.
Hi Jenn, Unfortunately I do not have those measurements. We posted this tutorial back in 2011 and no longer have the piñata to measure. I apologize I can’t be more helpful!
@Cyd Converse, no worries! Thanks for the response.
Thanx you for showing me how to do the number one for a Kidz first birthday party I do it
Thank you, Yuna!
Realistically, how difficult is it for 4-6 year olds to break a cardboard piñata? Your tutorial is great for purely decorative piñatas, but worried about it being too structurally sound for breaking purposes.
Hey Veronica! I think it probably depends on the kids! In the end it’s just cardboard and tape, you definitely intentionally leave some of the seams a little loose to make it easier to bust open for smaller kids.
Thank you so much for this tutorial! This would so fun to make with kids!
Yes, Toni! My kids have all helped me make them before and had a ball!
So so fun! We need to have a pinata when we celebrate my son’s birthday soon!
Thanks, Katie! He would love it!
THANK YOU!!! making this for my son’s 4th birthday. was just going to use a shipingbox but this is much more fun
Love this! I have to make this for my son’s birthday!
That is amazing. I can’t believe my eyes. Well done.
That is awesome! I never even thought about making my own pinata! Now I totally want to make one for my kids!
.-= Darcy’s most recent blog post: Tooth Fairy Door =-.
Dear Chelsea,
I loved your DIY instructions and the photos for the pinata so much I added your post to my blog today. Hope you enjoy the reading. Sunny Regards from Lugano, Switzerland.
http://expatwithkids.blogspot.com/2011/06/partying-in-lugano-dolphin-party.html
This looks WAAAY too good to be made out of cardboard and a cereal box. ; ) Beautiful job!!
How adorable and you made that look soooo easy! I may have to attempt one this summer.