


Hi all! I was cruising the aisles at Michaels on a mission to not buy anything except hot glue and I happened upon the clay aisle. I was amazed at the range of gorgeous shades they have now, some are even pearlescent. Truly stunning. I had to find something to make with this pretty little craft staple. So, I did. I can’t wait to make matching flags and food tents for Henry’s birthday! (I promise this is the last goody-on-a-stick for a while.)
supplies:
- polymer clay
- clay softener drops (optional)
- cookie cutters + stamps
- knife + toothpicks
- wax paper + foil
- lollipop sticks
- rolling pin
Work the clay in your hands until pliable. Mine was pretty stiff, so I used a few softening drops and kneaded in a plastic bag to make it easier to work with.
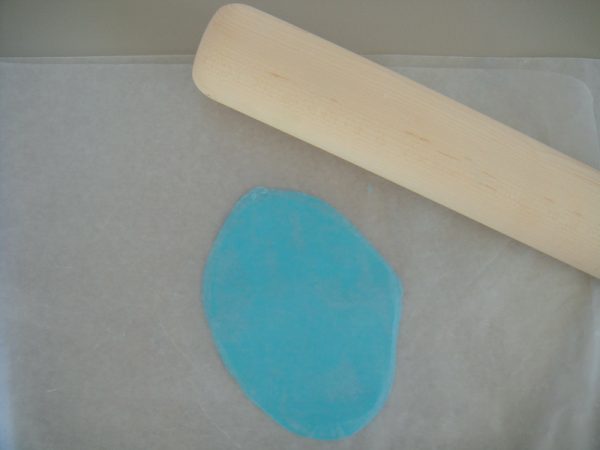
Place a sheet of waxed paper down and put the slightly flattened clay on top. Top with another sheet of wax paper and using the rolling pin, roll out to about ¼” thickness.
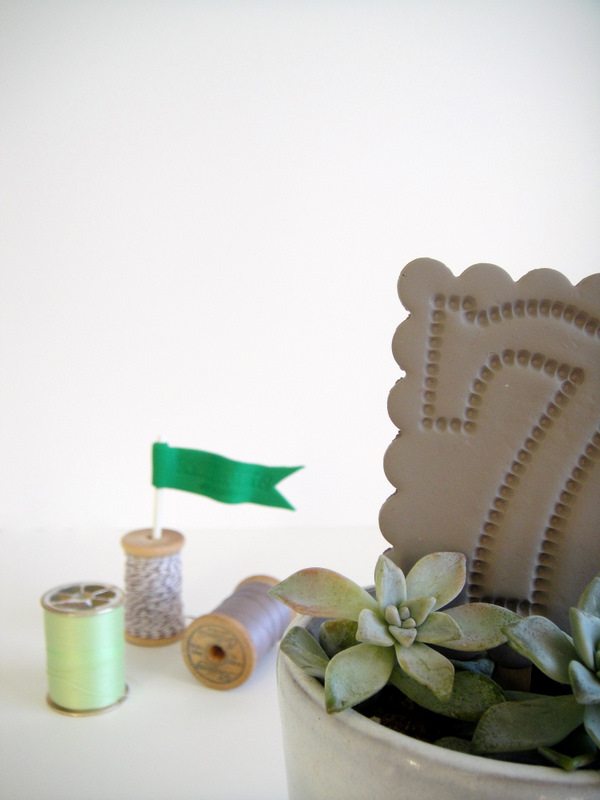
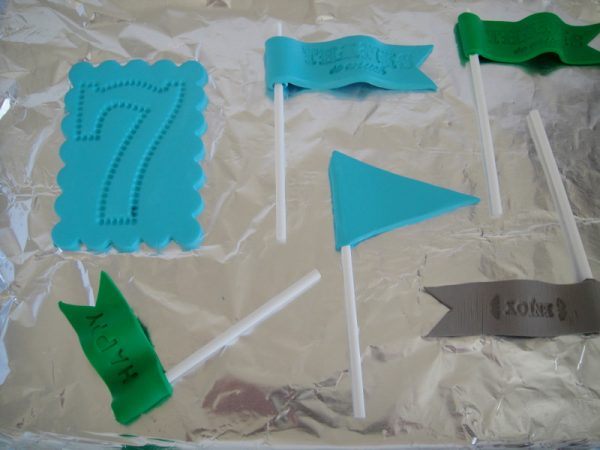
TABLE NUMBERS:
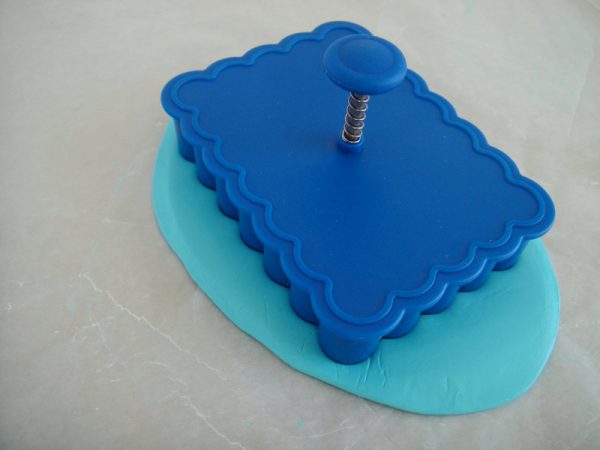
Using a large cookie cutter, cut out a shape for the table number. Transfer to a cookie sheet lined with foil.
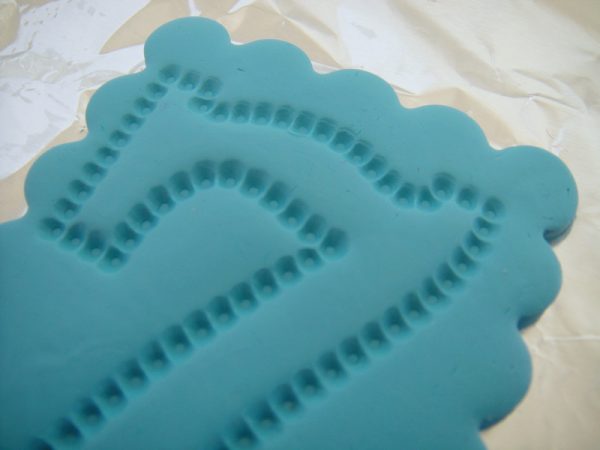
Using a large number stamp, center and press for each. For these I used the scalloped rectangle from Message-in-a-Cookie Cutters from Williams-Sonoma and Martha Stewart Crafts stamps. Similar large number stamps can be found at Paper Source.
FLAGS:
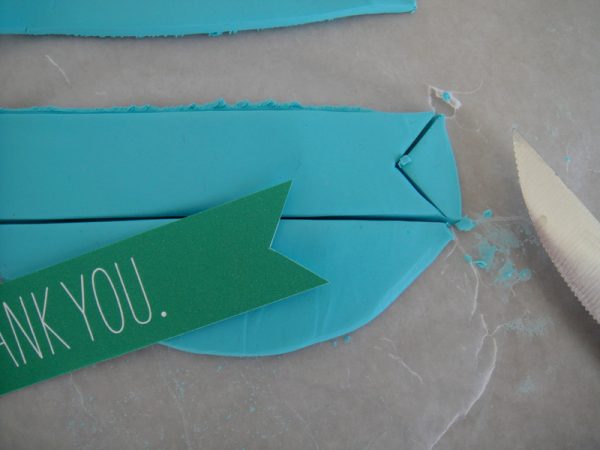
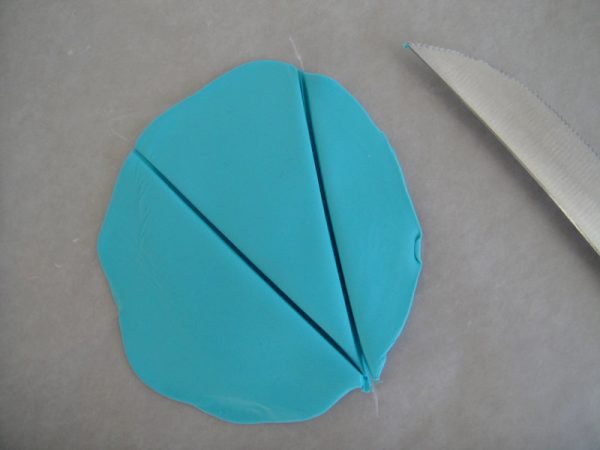
Cut a flag shape out of paper. Place on clay and trace with knife. Clean up the edges with a toothpick and smooth with your finger.
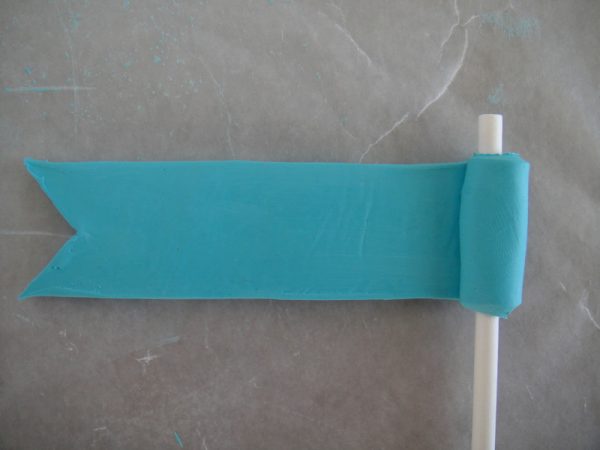
Flip the shape over and flatten the edge of the flag and roll around the lollipop stick.
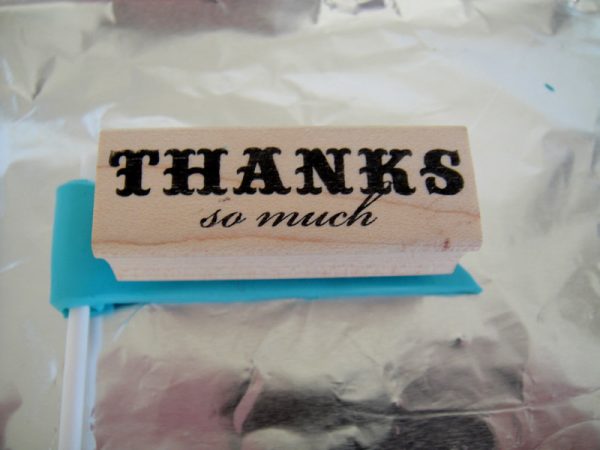
With the front side on top, place on a cookie sheet lined with foil. Stamp any design on top- a monogram/thank you/enjoy/happy birthday/hooray/etc. The ‘THANKS so much’ stamp is from Impress.
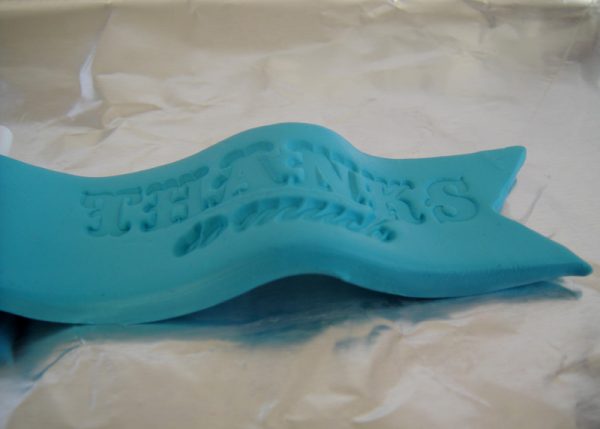
Shape the flag wavy, as if it’s blowing in the wind or leave flat, either way, the shape will stay however you set it.
PENNANT:
Cut a triangle shape for a pennant. Attach to lollipop stick.
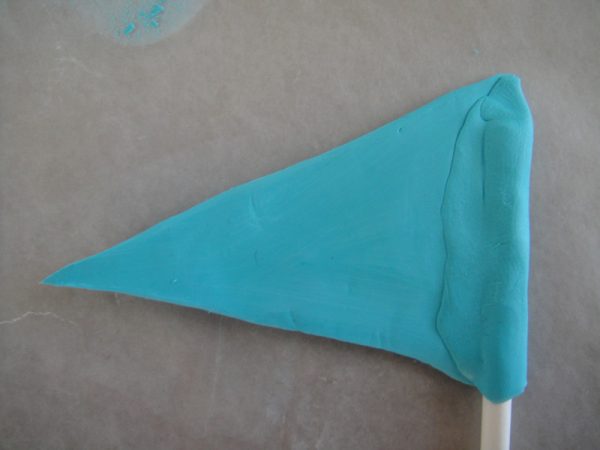
Another method to attach a pennant or flag is to wrap and smooth edges around the stick. You could also use small flags, with small wood dowels or toothpicks for mini toppers.
Bake at 275⁰ for about 15-25 minutes, according to the directions on the clay. Watch carefully, but make sure they are in the oven for a long enough time.
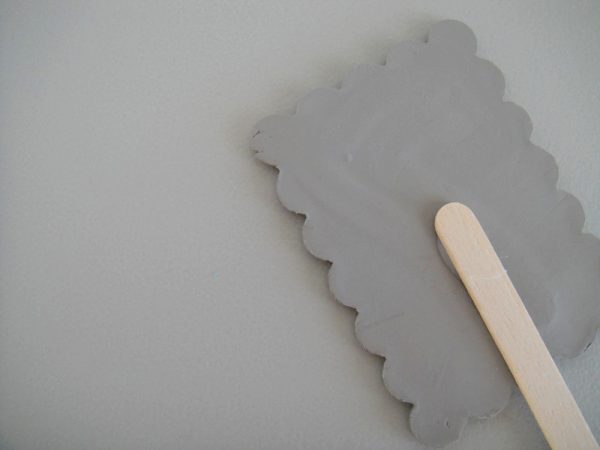
Once cool, hot glue a popsicle stick to the back of the table numbers. You can also hot glue a ribbon to hang.

{Photos by Hank + Hunt.}


 Back to Top
Perfect idea!! Thank you for sharing with us another amazing project Jenny!!
This is soooo adorable and what a great idea! Thanks:-)
fabulous idea! my son is henry too, fyi.
Those are really beautiful! And so many available colors, I love it! Thanks so much, I’ll be linking.
LOVE this! I have so many stamps, I am definitely going to try my hand at this. Thanks!
This is such a cute idea, thank you for sharing… I know that feeling of TRYING not to to buy more than what’s on the list at Michael’s… I could spend hours in that store!
these are way adorable, cyd! a great idea!
This is a great idea and inexpensive!
This is just precious! I have tons of stamps, now you’ve given me a creative way to put these puppies to use. Thanks!
Love this! I need to go out and purchase some clay now!
I love this! I have that same problem with Michael’s and JoAnn’s. Go in for one thing, but leave with more… I absolutely love the little flags! I’m filing this away as well. Thanks for sharing!
Genuis! This is crazy creative…I might have to throw a party just to try this:).
Blowing my mind Jenny! I love this! I have been wanting to start playing with clay but wasn’t sure how to or what to do with it. This is so rad. I say keep the things on a stick coming. They never disappoint! :)
Love this Jenny! I am filing this idea away for later!